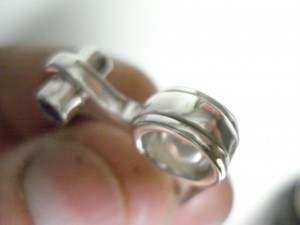
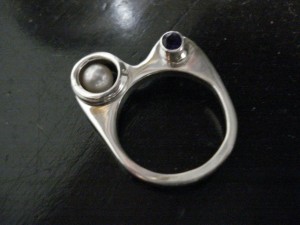
Well, how did the ‘floating’ pearl turn out? Remember my suggestion to student A was to drill a hole approximately 1mm through the top of the large wave, countersink the hole, insert a pin through the hole and cement it into the pearl. She did this out of class and brought it back with the cement cured and about 1mm of the pin sticking out of the top of the wave. I used this opportunity as a demonstration to the class on how to create an invisible rivet.
First, I cut the pin down to about 1/2 mm above the surface. Then with my cross peen riveting hammer, gently, so a not to disturb the cement or the pearl, tapped the edges of the pin down and into the countersink. I then smoothed the top of the rivet with the ball of the hammer. This all took about 10 minutes after which I told her to file, sand and polish the rivet head until it disappeared. She was apprehensive the rivet would still be visible but when she was finished….the rivet had disappeared!! The pearl appeared to simply float in the tube. 

This next problem actually came several weeks ago. Student M is from Venesuela and does beautiful work. She has been working on several projects lately, but one is a bronze bracelet consisting of 5 rectangle shaped (actually more pillow shaped) curved plates that she freehand etched with some lovely designs. The bracelet plates will be held together by two wide jump rings between each plate.
Her idea was to add three stones to each plate….two matching top and bottom and one contrasting in the center. The curvature of the plates is slight and she already knew how to create a saddle bezel so that was no problem. While the two outside stones were to be bezel set, the center stone will be prong set.
THE CHALLANGE: How to accurately place and solder four prongs in the center of each plate at the same time?
My answer to her was to make two pieces of wire into a ‘U’ shape with flat bottoms. Set them up at a right angle with the bottom of one ‘U’ crossing over the other. Solder them together. Now trim the tips so they are even. Pre-solder the tips of each prong, do all the pre-soldering protocol, place them (tips down) on the plate exactly where she wants them and solder. Cut the bottoms of the ‘U’ off leaving sufficient length to hold the desired cabochon. Result is a perfectly positioned set of prongs.
Again, I need to get pictures of this project and hopefully will have them next week. Till then, Cheers and happy soldering, etc, etc, Don.
coralnut
Latest posts by coralnut (see all)
- Value of Black Coral - March 3, 2011
- How to Work Black Coral - January 1, 2009
- Black Coral Revisited - December 29, 2008

{ 2 comments… read them below or add one }
Great explanation & photo—I’m looking forward to seeing the finished
bracelet. Anne
Wow – what a great teacher!!! Thanks for the very clear explanations, and the great pictures. Look forward to the pictures of the bracelet.
You must log in to post a comment.