Projects
Faux Bone and Copper Cuff Bracelet project as seen in Lapidary Journal/Jewelry Artist July 2008
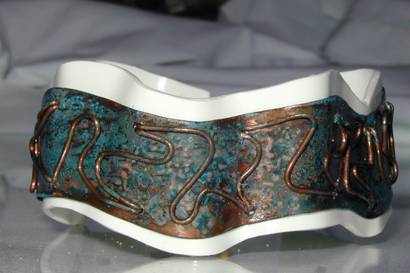
Artists are always in the market for a new and exciting material to create their art with. I have discovered Robert’s Real Faux Bone ™. This material is limited only by your imagination. For this project, Faux Bone™ is heated and coaxed into a wavy shape, and overlaid with copper that has a rich patina applied to create a copper and Faux Bone ™ bracelet. Go ahead and have fun!
Materials and Tools
1) Sheet 1/16” thick Faux Bone ™ (www.fauxbone.com)
Shaping Tool (www.fauxbone.com)
Bench Vise
Ammonia
3/8” barrel curling iron
Flush Cutters
4’) 20 gauge copper wire
Table Salt
Jewelers saw with Fine blade
Bezel tool or small wooden push stick
1) 1 ½” x 8” piece of 12 oz. copper sheet
Spray Lacquer
File, 400 grit sandpaper
Pickle or alcohol
Beeswax
Round an d flat nose pliers
Small plastic di sh
Small clamp
Larger clear plastic container with a tight fitting lid
Drill or Flex Shaft with 5/64” bit
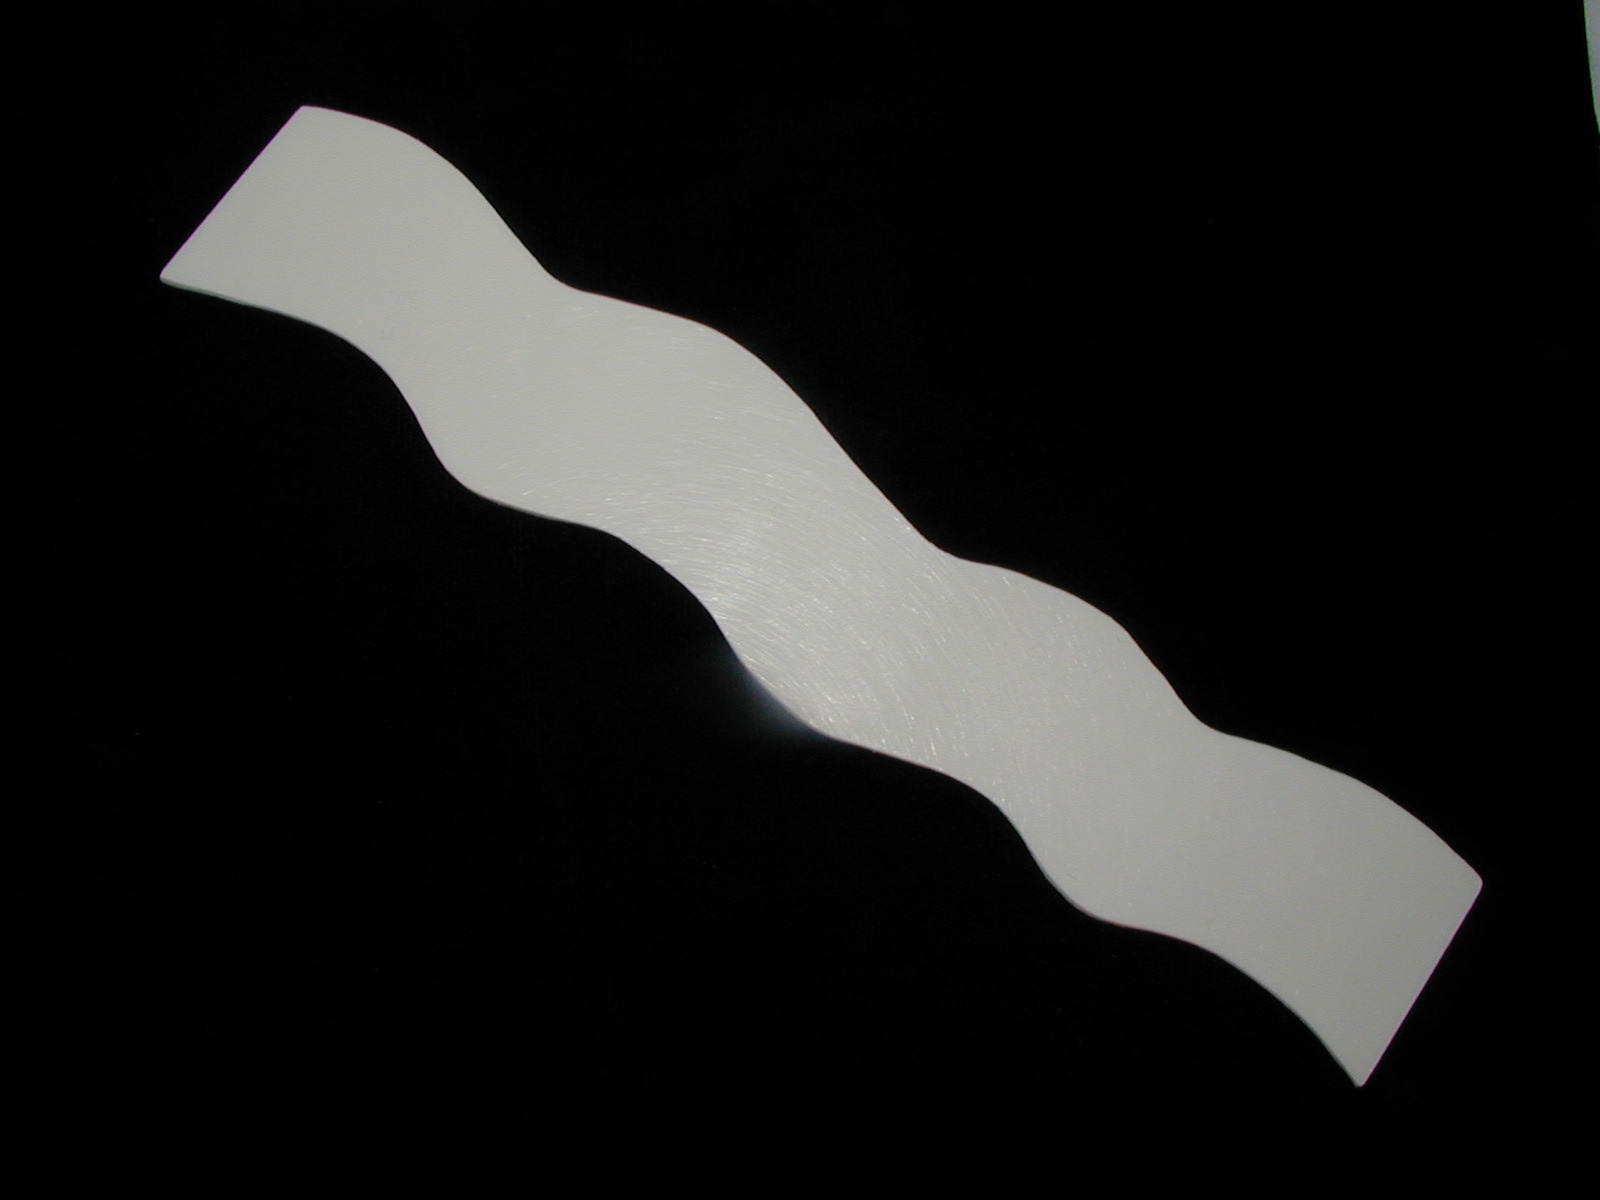
Start by making a paper pattern similar to the shape shown inthe photo.The pattern in the photo measures 1 1/4” wide and 7 ½” long, width is determined from top of curve to bottom of opposite curve; this size will yield an approx. finished size of 7”. Trace your pattern on the Faux Bone™ using a pencil, cut out the pattern with your jewelers saw and a fine blade. Using the Shaping Tool, gently shape the sides of the Faux Bone™ to smooth them out. You may finish the piece per the instruction sheet you receive with your Faux Bone™ or you may choose to leave it glossy.

After you have your Faux Bone™ finished to your liking, trace the outline and measure in 3/16” from ends and sides C ut out and trace this pattern on to your sheet of copper. Using your saw and a #1blade, cut out the copper component, file and sand the edges smooth and lightly sand the face.
Place the copper piece on the Faux Bone™ to check for proper alignment. File if necessary to adjust fit.
Position the curling iron in your vise and heat on high. Hold your piece of Faux Bone™ with desired finished side facing away from you. Beginning at about ¾” in from one end heat the piece from the backside and bend gently to approximately 30 degrees. Hold the piece until it cools. Flip it over and heat the opposite side, bending gently to approximately 30 degrees.
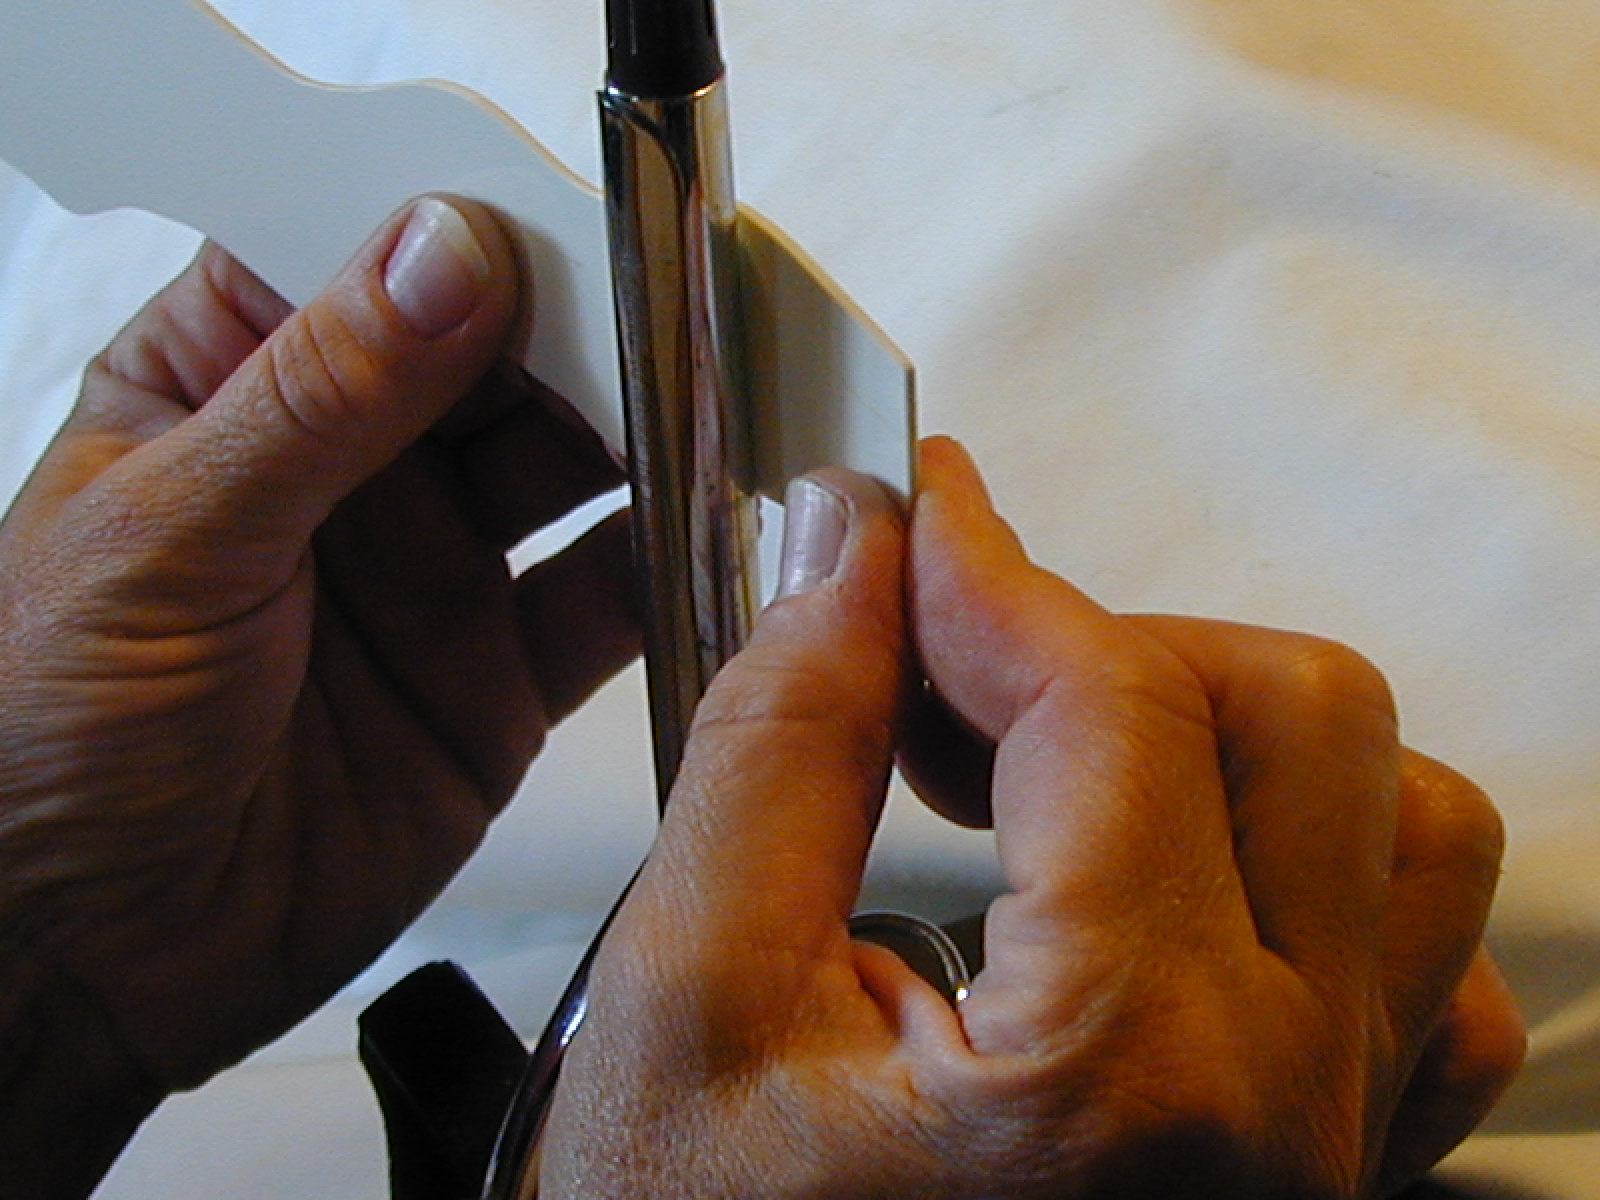
When you get to the center this may require a 90 degree bend. Follow the same sequence until you are about ¾” from the opposite end. Test fit the bracelet as you go to assure a good fit. Sit the bracelet on a flat surface to check to see that it lies flat, you may reheat and correct any areas until the piece lies flat.
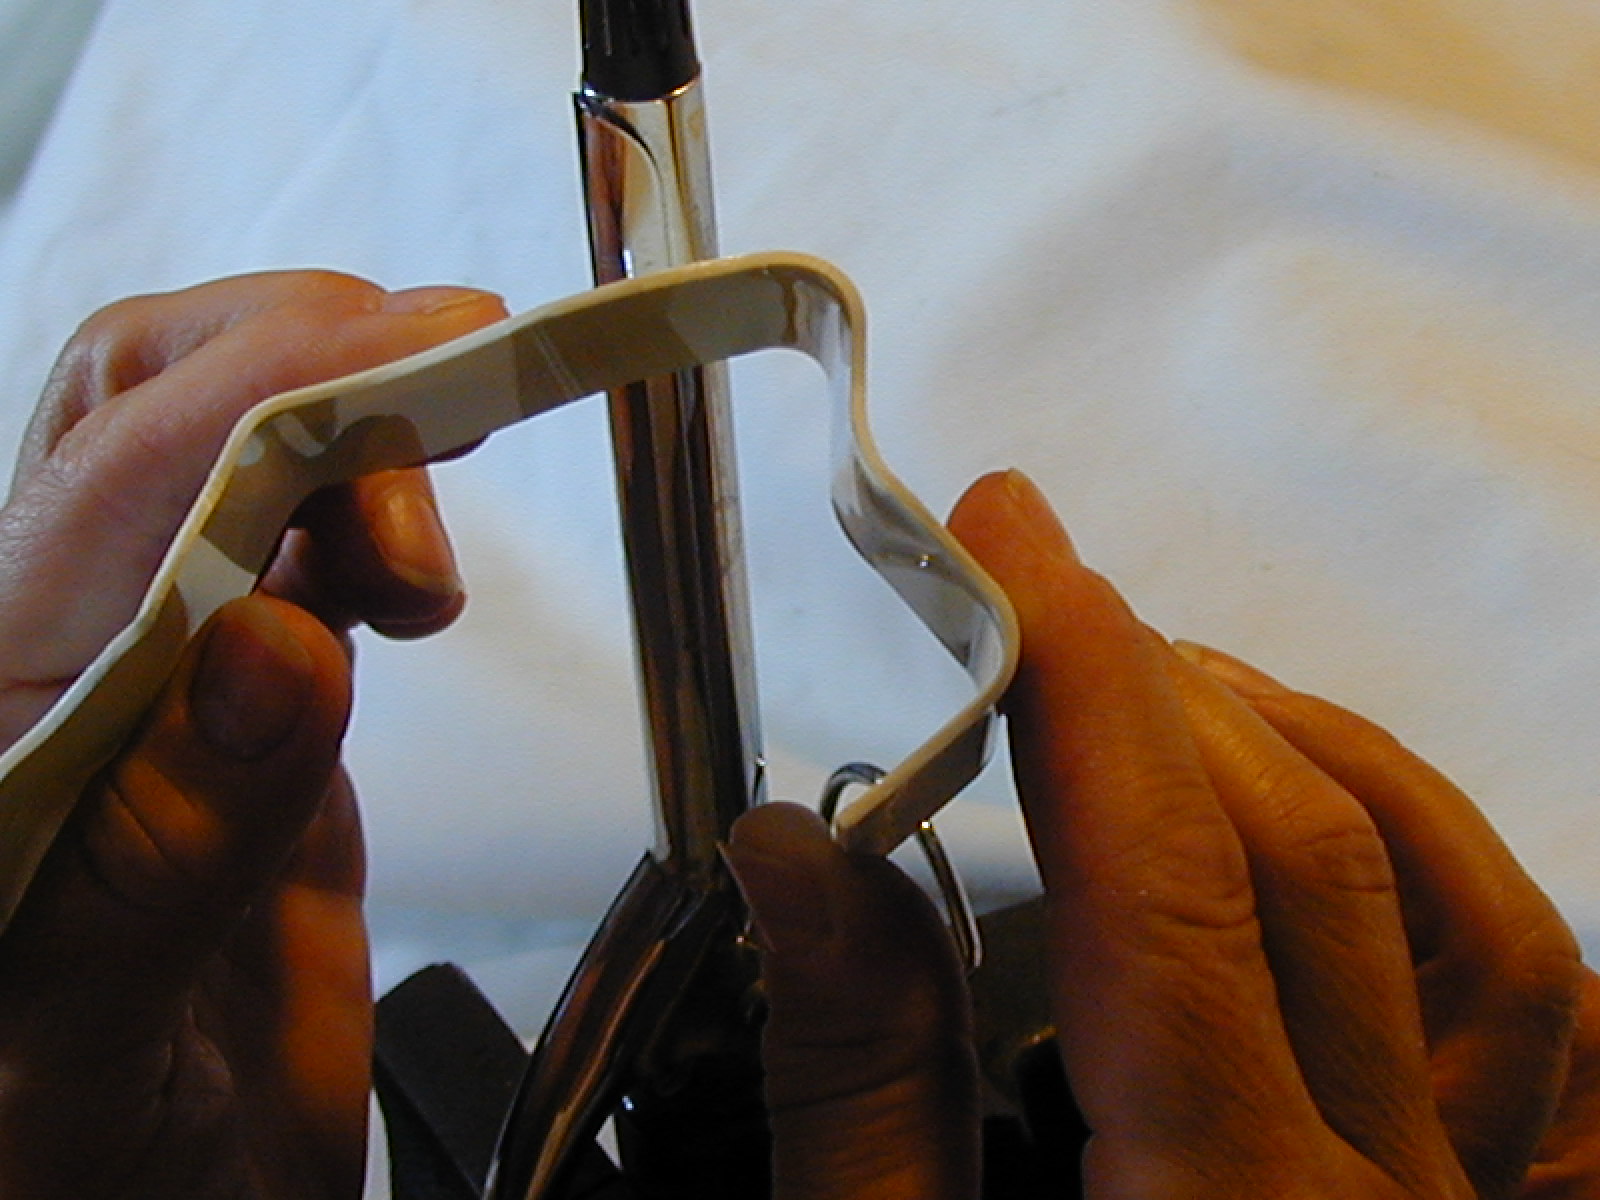
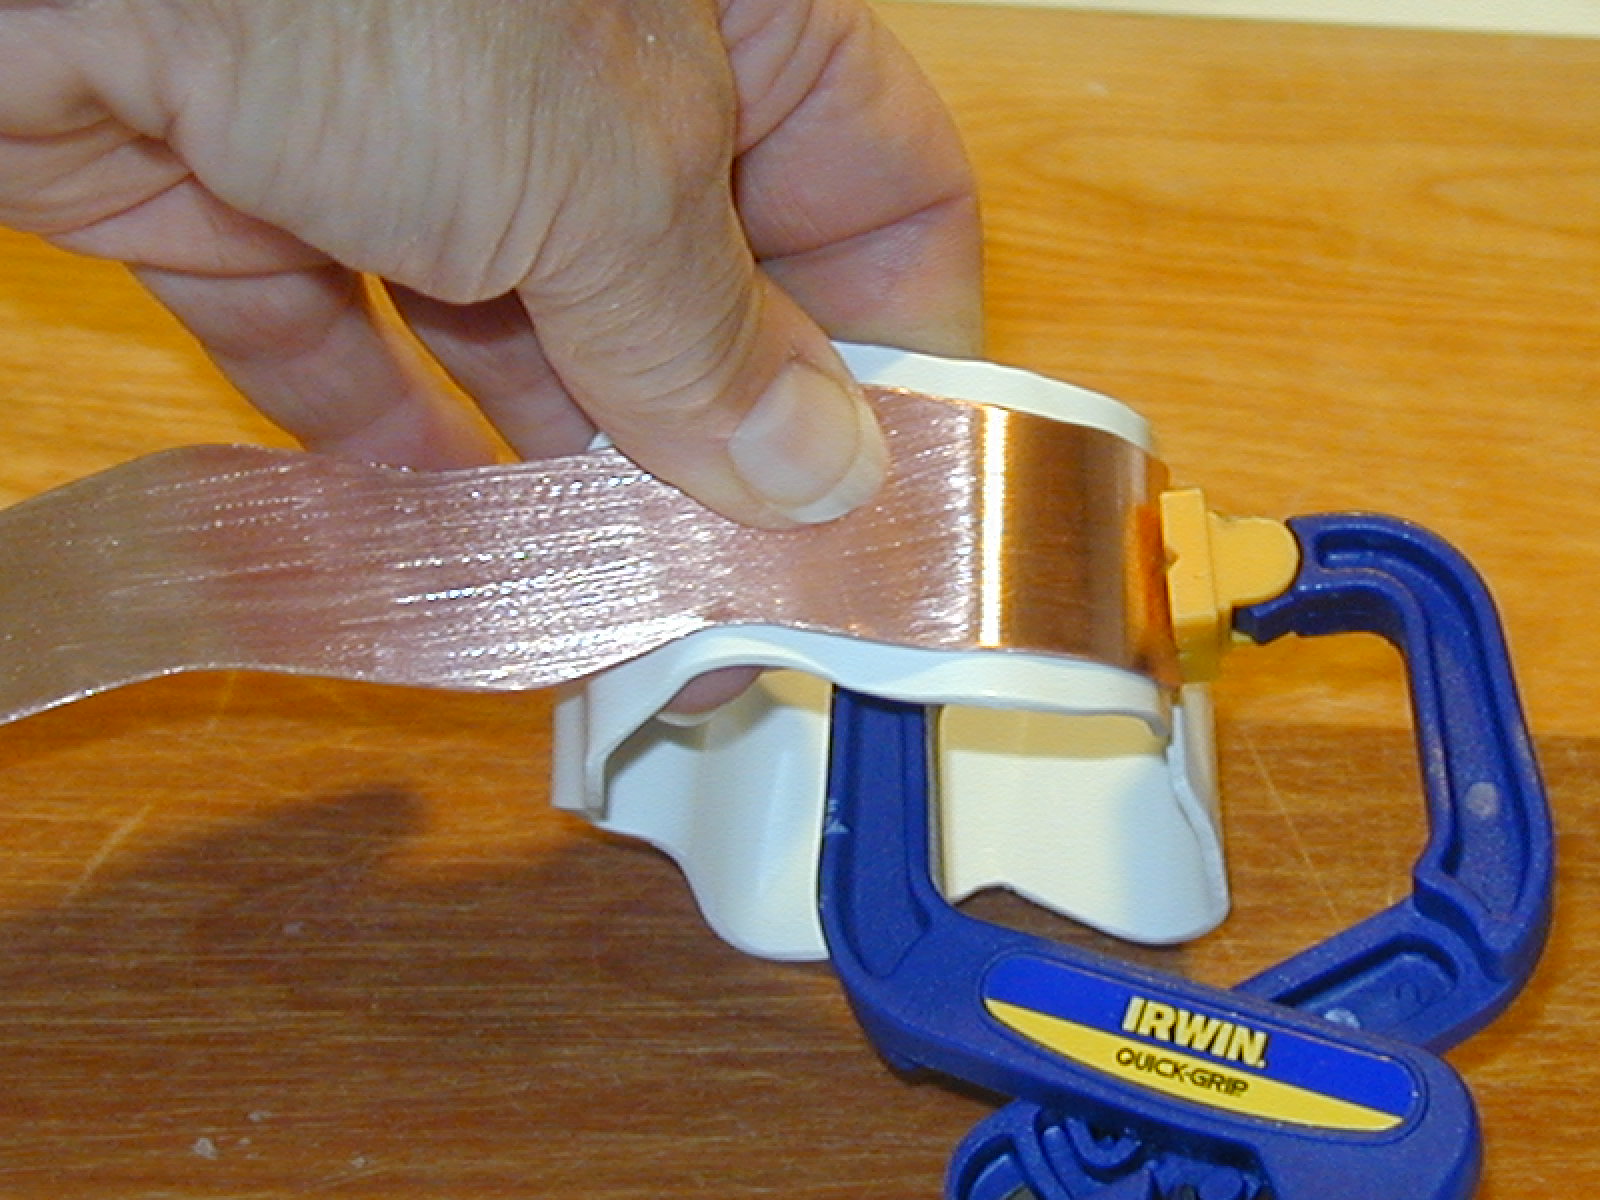
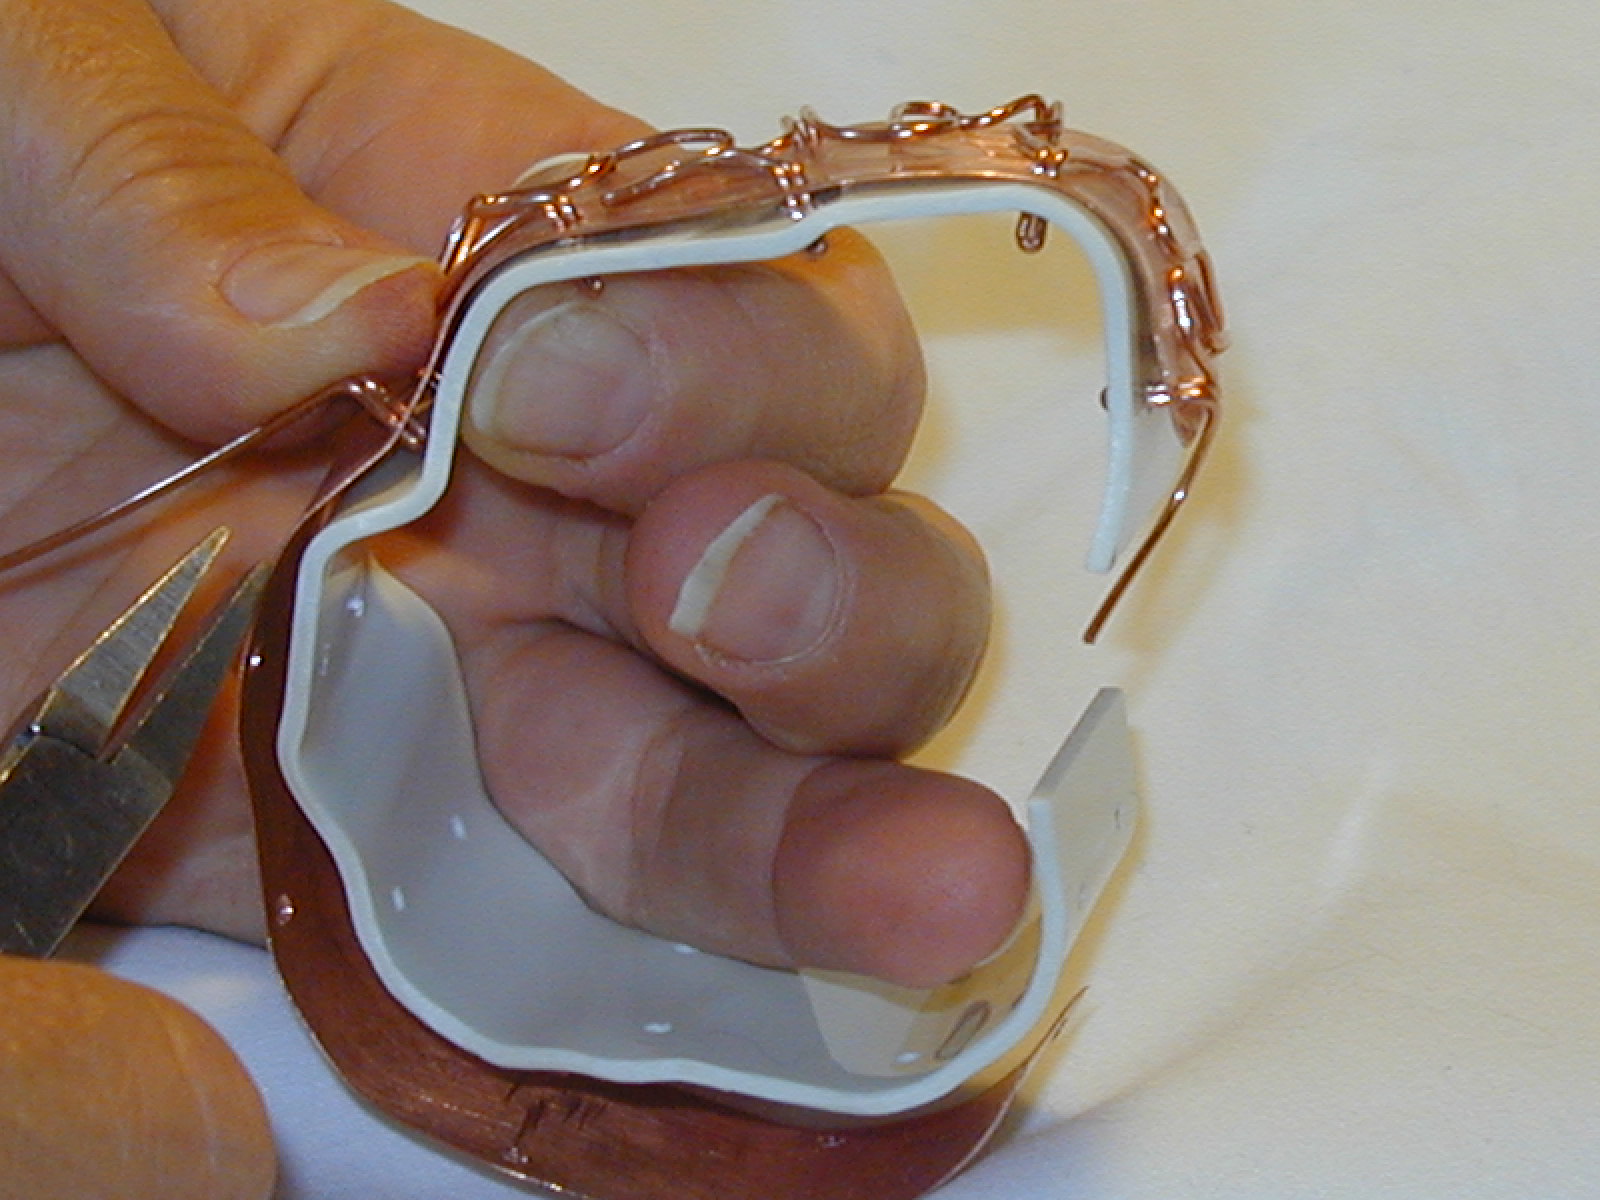
After the Faux Bone™ is bent, clamp your copper piece on one end, shape the copper to the Faux Bone™.
After shaping the copper, mark the spots where you will be drilling the holes to attach the copper to the Faux Bone™. Using a 5/64” drill bit, drill holes, keeping the drill bit twisting as you pull it out. Deburr as necessary. Transfer the markings to your Faux Bone™ and drill, deburr as necessary.
Lay your copper piece back on the Faux Bone™, make a loop in your wire approximately 1” from the end and pinch closed with flat nosed pliers. Make a 90 degree bend ¼” from the pinched end and place the wire into your first hole leaving the tail long to terminate later. Using round nosed pliers decoratively curve wire towards the next hole. Make a loop, pinch closed, make the same 90 degree ¼” bend from the pinched end and insert in the next hole. Do not bend tail on the inside. Hold if necessary with a clamp or your fingers. Continue the same method until you get to the last hole. Trim wire and terminate both ends by curling decoratively. Remove wire form and copper.

Pour a small amount of ammonia in the small container and set inside the larger container. Clean wire form and copper in pickle solution or alcohol to remove any contaminates. Wash off pickle or alcohol with plain water. Leaving wet, sprinkle copper piece with salt then drag the wire form through salt making sure crystals stick. Place both in larger container with ammonia and cover tightly. Check after two hours for desired oxidation. Remove and wash with soap and water. Dry thoroughly. At this point you will apply your finish, one suggestion is a high quality spray lacquer in two to three light coats.
To reassemble the copper wire form and copper component back on to your Faux Bone™, start at one end and using a bezel tool or wooden dowel, bend tabs towards one another on the backside of the bracelet, making sure the bend is snug
judyfreyerthompson
Latest posts by judyfreyerthompson (see all)
- Musings - May 20, 2012
- Robert’s New DVD “Faux Bone Jewelry Tools and Techniques” - June 7, 2009

{ 1 comment… read it below or add one }
How cool is this…the by-pass Faux Bone bracelet on my bench which has been in process for 5 months now, was taking on a similar look to yours so that I could practice with my jeweler’s saw. But I drilled multiple holes in it, so it’s taking an altogether different direction! I’ll send pictures when it’s finished…also will add you to my links page.
Sarah Triton
Sarasota FL