Construction of an End Clasp
1.) I have selected a piece of 22 gauge Sterling of 24/32 of an inch wide by 1 24/32 of an inch long. (cut to size)
2.) Annealing should take place before scribing, drawing or chasing the design on the sheet metal.
a) Flux the piece on both sides, I used Stay Silv and mixed a little water in it to thin it out a bit. Fluxing prevents firescale damage from the annealing process. I make sure there are no exposed areas on the piece by covering it all in a layer of flux.
b) I turn on my torch (propane) and adjust the settings to get an oxidizing flame; it’s light blue and rounded at the top with a deep blue inside, like a feather point. A reducing flame is bushy and has a bright blue color, it can potentially melt the piece. The annealing temperature for this metal in my studio would be 1100 degrees Fahrenheit. The flux will turn into a thin clear liquid at this point. You can anneal in a dark area to see the piece and the color upon it. The piece should be heated to a dull red glow only and quenched immediately in water. After it is heated, I carefully turn off the torch according to the d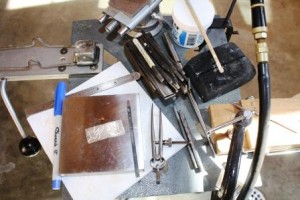 irections in the operating manual.
c) Quench immediately in 1/2 pint of distilled water after heating and do not allow to air cool as this will harden the piece. Rinse and dry.
d) I use a jeweler’s saw with a blade of 2/o or 4/o; that’s two ott or four ott for 22 gauge sheet. Quality blades are essential here so the compromise in expense is worth it.
e) Saw off the parts to make a perfect rectangle. I’ve used a stainless steel rule to measure; it’s precise. Also, when you’re sawing, the bench pin that holds the piece should be shoulder high and the saw kept vertical while sawing in an up and down motion. I always run my saw
through beeswax, it’s easier to cut.
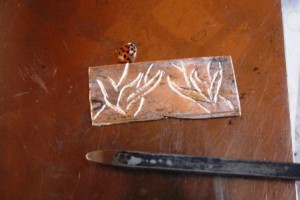
 Shop shears will cut it, but then you’ll need to pound it flat again from the back side. If you saw the piece, I recommend that a tray underneath or apron is below to catch the filings. The filings can be refined and this proves nice after collecting it for awhile. 3.) Drawing the design ;a) A design can be drawn on the sheet using a fine point Sharpie pen or steel scribe. I prefer the Sharpie because then, I can see what I’m chasing better. b) Place the metal on a steel bench block at least 4″x4″ and tape the edges down; being careful not to cover the work to be done. To keep my block in good shape I use Blue masking tape (painters tape), it doesn’t leave a residue on my block.
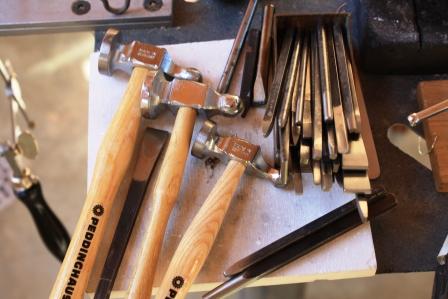
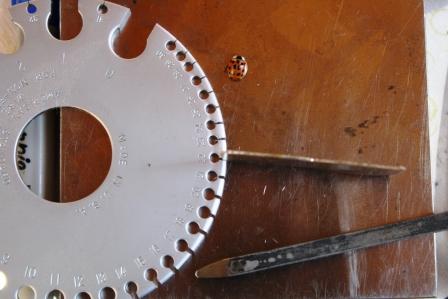 c) The hammer’s used to chase this piece are Peddinghaus German Chasing Hammers. These are good quality hammers to use, I’ve enjoyed mine for many years. I select a liner as the one shown on the right to chase my work. I run it over the lines semi-vertically, then tap the chaser (liner) with my hammer as I bring it toward me, almost like making a stitch with an electric sewing machine but closer, so that the stitches are in uniform line. As I chase, I move the tape around to accommodate my position. If the metal at any point bows up, I flip it and hammer it flat again.
d) If the piece begins to ping, then I have to repeat the annealing process to soften the metal, as it will become work hardened. With this piece being as small as it is, I just turned it over and flattened it again to avoid using my propane.

4.) Sanding; I use 2000 wet and dry paper for metal to sand down my piece. The edges will be filed with a Mill bastard to make the edges smooth. Then if needed, I use a little Tungsten file for a final touch.
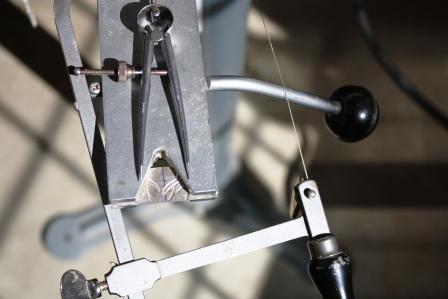
5.) Forming; I take the piece and cut it in equal halves. To get the halves measured precisely in half, I’ll use a Steel rule and my German made Starrett dividers.
a) Annealing must take place again following the above mentioned procedures. then, the metal is rolled around a cylinder that I selected in the size that will accommodate the bracelet ends comfortably. The diameter of the chain measures 3.57 mm, therefore, I’ll use a mandrel no larger than 4mm; forming it where it’s not too loose or too tight.
After forming the piece around the cylinder, the ends are brought up tight and overlapped to fit the desired size. The ends have to be butt up against each other so that there are no gaps present. If it’s not
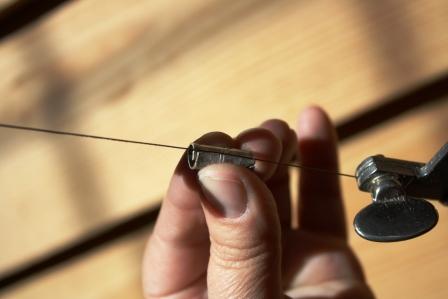
equal, then sanding to make the edges fit flush together must take place.
b) Soldering; I will flux the whole piece and if needed get a pair of strong soldering tweezers to hold the seam together while soldering. Always use Hard solder for the first soldering step in a piece. There are three types of silver solder; Hard, Medium and Easy. When soldering up pieces, it’s best to solder in this order so that the heat in the final soldering will stay. I place the small cylinder on my charcoal block, the small groove in it helps the piece remain steady. I cut snips of Hard solder and place them along the seam. the seam should be tightly closed. The solder will spread out, so tiny gaps between each pallion or wire of solder (no larger than 2/32″.) Another method would be to hold the solder in one hand and feed it on the heated seam. The whole piece should be fluxed before applying heat to prevent firescale from forming on any part of the piece. It’s pretty much impossible to get out a firescale stain even with pickle. If the chosen method of solder is snipped chips, then having a pair of stainless tweezers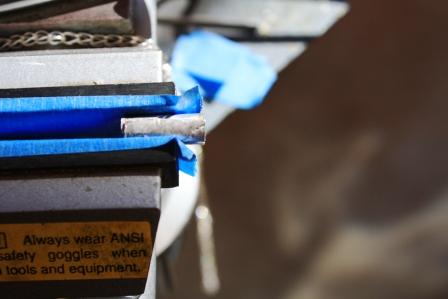
handy and a nice solder pick is essential because sometimes the air from the torch might blow it off the piece.
When bringing the semi-bushy flame to the piece, work quickly and keep the heat on the piece by moving the flame in a circular motion around the piece. Hard solder takes a little longer to melt. The solder must be clean and not have finger oils on it or it will not flow. I sometimes will run mine through fine sand paper for metal. All pieces must be clean as well, this is done by pickling, rinsing and drying. When the flux bubbles, it’s almost time. When you see the solder flash and melt into the seam, then immediately remove the torch and turn it off according to the guidelines read in the torch manual (know this before beginning.) It needs to be quenched again in distilled water. It now needs to be pickled so that the silver can be brought out again.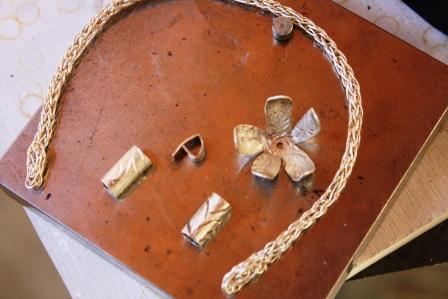
6.) Pickling; Jeweler’s Pickle can be found at a jeweler’s supply such as Rio Grande or Otto Frei. I use a mini crock and heat the water in it and introduce about a tablespoon of pickle in a tiny crock. Everything used with pickle should be used ONLY with pickle; it is corrosive. Copper tongs should only be used in pickle, and nothing else. ALWAYS WEAR GOGGLES when doing anything in pickle or jewelry for that matter. The pickle must be placed carefully into the crock so any acid does not get onto your skin or in any place in the studio. The piece should be in the pickle no longer than five minutes. After lifting the metal out of the pickle with copper tongs, it must be rinsed in distilled water and the water should be disposed of as soon as possible after that.
7.) Reforming; Steps to reform the piece can be taken by placing the end over a smaller mandrel and working it to its proper shape and then over one that is fairly snug. Shape it back to a perfect cylinder.
8.) To make the end of the cylinder, there are many ways to close it.
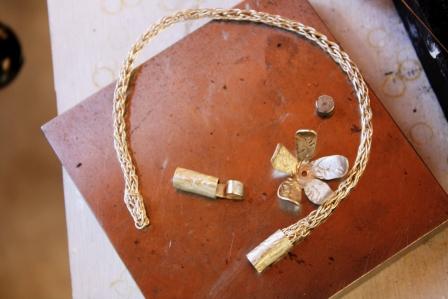
a) I’m going to use my own designed bayonet clasp with a hand made head pin that can be drawn out of the flower and inserted into the clasp. After soldering these pieces together the clasp should work fine.
I will be fluxing all my pieces that come into contact with the flame and begin
with hard solder on both sides of the cylinder mechanisms. The last soldering

Reference Books:
The Complete Metalsmith by Tim McCreight
Jewelry Fundamentals of Metalsmithing by Tim McCreight
the design and creation of jewelry by Robert Von Neumann
Chasing Ancient Metalworking Technique with Modern Applications
by Marcia Lewis
Moving Metal by Adolph Steins
{ 0 comments }
shelliegonzalez
Latest posts by shelliegonzalez (see all)
- Construction of an End Clasp - February 27, 2012
