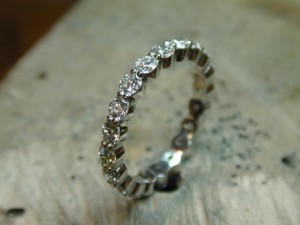
- A diamond eternity band made in platinum.

I love making eternity bands. Each one is a multi-piece puzzle that requires patience, solid but basic techniques and math, but no high tech equipment. The design is classic and simple, yet versatile. Here’s how I made mine.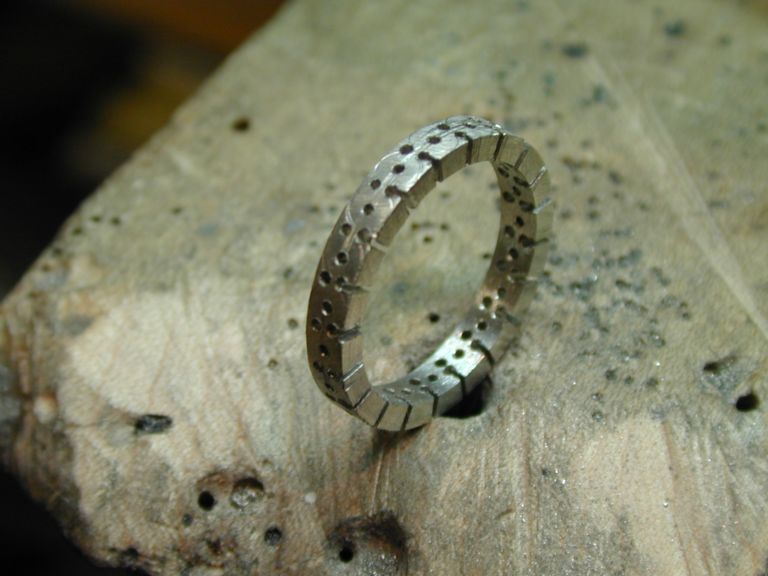
After making the band to size and determining the number of diamonds needed, I marked and drilled holes where the diamonds would be placed. Then I marked and drilled holes for the prongs.
Once I had the band drilled I began to removing the excess metal from around the prongs.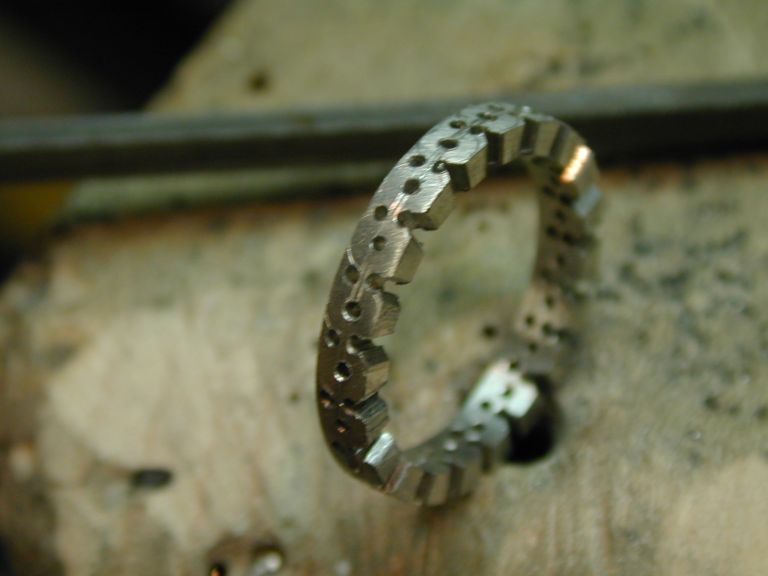
I don’t remove too much metal from around the drill holes. You’ll see why later. I begin to shape the metal that will be under the diamond.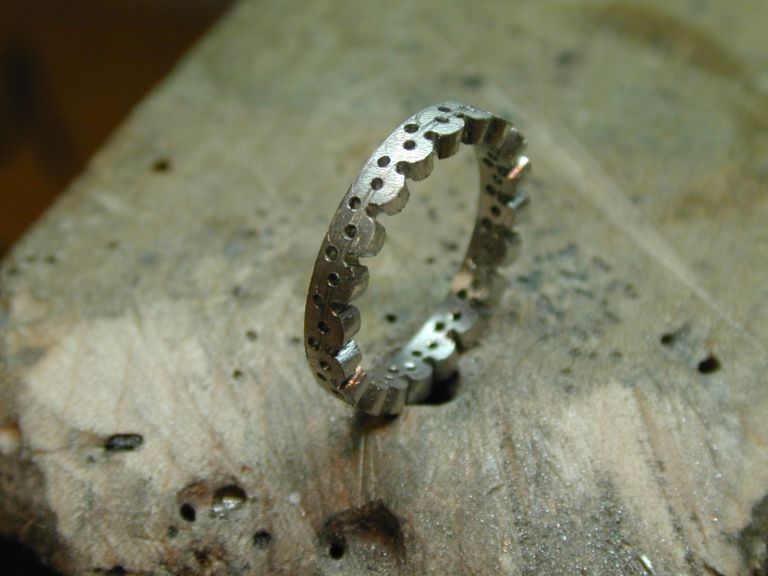
Now the area under the stone is completely shaped. I only carve one side at a time. If I did the other side at this time, the band would be weak and bend as I worked it further. 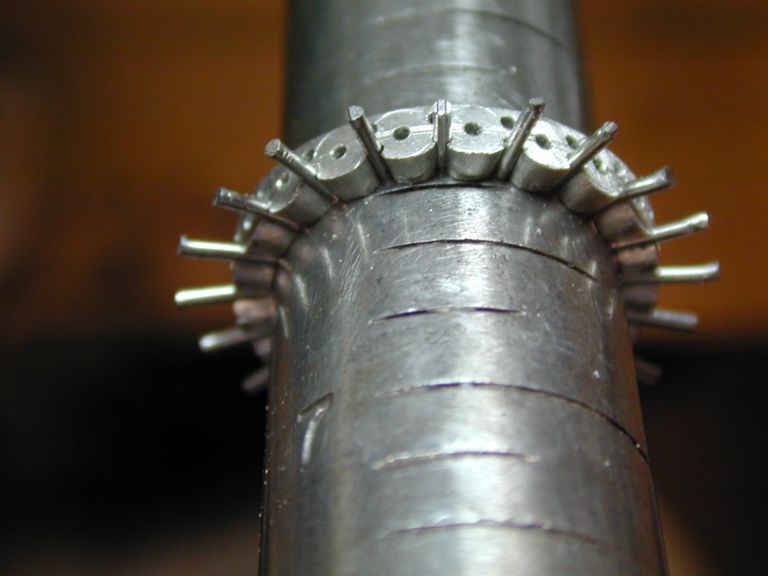
I’ve cut the prongs and placed them in the holes I drilled previously. Now you see why I didn’t remove too much metal. The prongs were tapped in with a hammer and won’t shift as I solder them individually.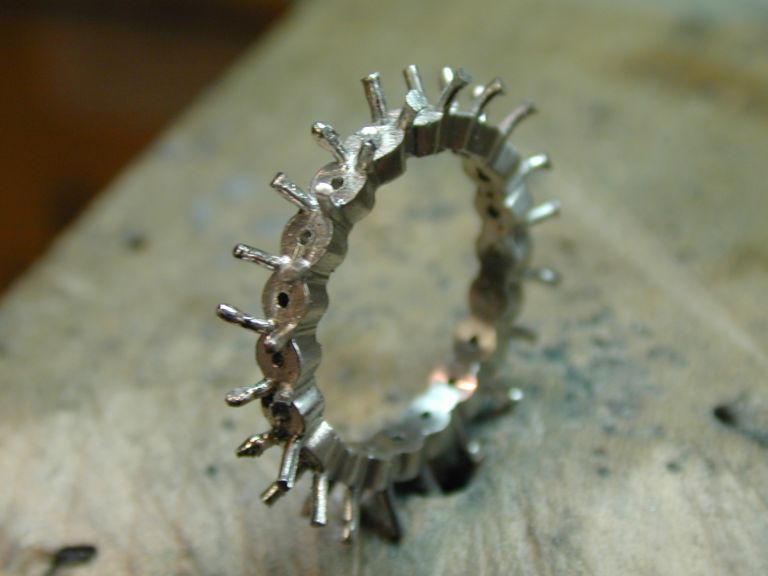
After soldering on the prongs on the first side using plumb platinum solder, I worked the second side and soldered those prongs on as well.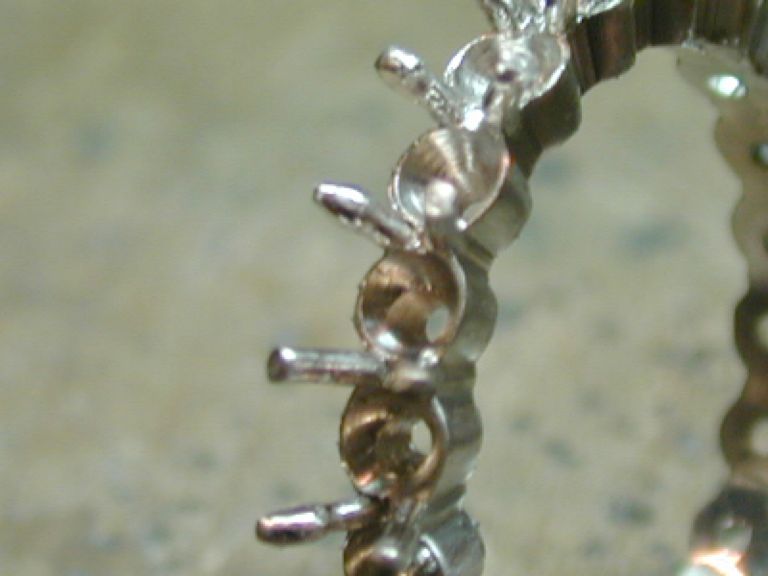
Notice I’ve pulled the prongs apart. This will keep them from getting in the way of the round bur. Notice that some of the prongs have slightly melted. Plumb platinum solder is a high temperature solder and the heat used caused some of the tips to melt. No problem, that area of the prong will be removed after the stone is set.
Using a round bur I made space for the pavillion of the diamond. Next I used a hart bur to create the seats in the prongs. To secure the diamonds, the prongs are brought back to their original straightened positions, trapping the stones in place. 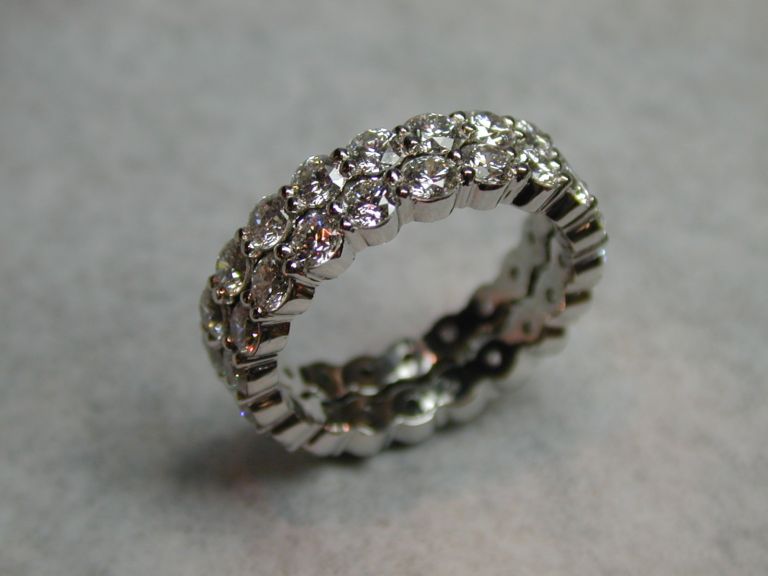 The final product.
larryseiger
Latest posts by larryseiger (see all)
- J Mason Custom Jeweler - March 13, 2010
- Portable jeweler’s bench: A test run - March 13, 2010
- Claw setting jig review and tutorial - March 4, 2010

{ 11 comments… read them below or add one }
To create the seats for the stones I use rotary tools, specifically round and hart shaped burs. The size you use will depend on the size of the stones. I didn’t use gravers on this job. If you want to make this project in a bezel style, you would need overall heavier stock to start with. It would have to be wider to accommodate the width of the bezels and taller to account for the height. In some ways creating this in a bezel style is much easier. There would be far less soldering but more time spent on carving the seats. You’d have to invest more in material cost and have more filings scrap. Take some time to draw out the design. This will save you a lot of grief along the way.
I am a complete novice so I would really appreciate if you can expand on a few points in your tutorial. What to you use to carve away the metal to shape the seats for the stones before you add the prongs? A am assuming a combination of gravers and files?
If I were to make this a eternity band without prongs (bezel set) do I follow the same steps but not solder any prongs and work to carve away metal then cut the seats?
Thanks so much for this tutorial!
I’m just a home dabbler, but I will definitely try this in silver with CZ’s. It’ll certainly push my currently lack of precision.
I think I may need one of those!!!
Thanks Larry! I will let you know how my attempts come out.
There’s a chicken and the egg aspect to this project. Which comes first the metal or the stones? You can start out with a strip of metal and then work out what stones to put in, or you can start with the stones and work from there. My choice is to start with the stones. A tip: The larger the stones, the fewer you’ll need. That goes for prongs too. If you’re doing this as a fun personal project and not resale, start with CZs and fit it to your size…or a loved one’s.
For stones, I’d suggest at least 3mm stones and I’ll also suggest prongs about 1mm in diameter. The stock should be just a bit larger than the width of the stones and the thickness you should start out with should be about the same as the total depth of the stone. After you make the band, you can decide whether the band should be thinner or if you want to keep the entire thickness. Once you have experience you can use smaller gauge for the prongs, but for now, in gold, I’d use the larger size.
I purposefully left out details like how to work out the number of stones. I would like for this to be a mental challenge. That’s part of the fun. A helpful place to start is to become familier with figuring circumference (diameter x pi = circumfrence). Get some grid paper and draw everything out, That is if you don’t use CAD, and draw everything out first; that is very important.
Good luck.
Great tips Larry! Thank you! Any thoughts on the dimensions of the band to start the project and gauge of the prongs? I know it will depend on the stone size used. Just thinking through the start of the puzzle.
Hi Carrie. Thanks for the feedback. I have made this design in 18 karat gold. In fact, the process of holding the prongs in place is even more important when using gold. The thermal conductivity of platinum allows you to solder right next to previously soldered areas. If you try and solder too close to a previously soldered gold or silver spot, often that spot will fail. With the prongs held in place as they are in this project, even if the solder flows in a previous spot, the prong will not shift. Care has to be taken not to use too much solder and not to over heat the soldered areas, but you avoid having to hold and each prong as you solder the next.
Brilliant. Just the way I make them. It is good to be “verified” as it were.
Nice part with those rings is the always look classy. As yours does to.
Hans
Very nice demo Larry! Have you made a ring using the same process in gold? I would love to try it. Can’t wait to see what you post next! -Carrie
Thank you for sharing. Very well done!
You must log in to post a comment.