[Insert Woodwright’s Shop theme song here]
So I originally posted this on my blog, but I have since eliminated that, so here it is again…Please feel free to make modifications as you see fit.
You will need some welding skills, if your horrible at welding, your bench will just look ugly, if you want a pretty bench, hire a welder for a six pack and call it a day.
So to start, you’ll need the following.
2″ square tubing
1″ angle iron
welder
chop saw
1 – 4′ x 8′ interior grade plywood
Optional – Drawer Set (see below)
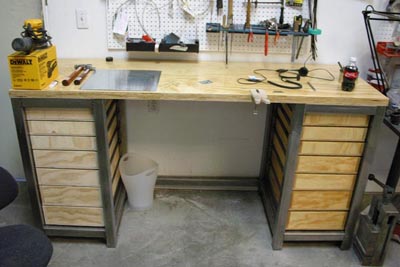
Here is what it looks like all completed….
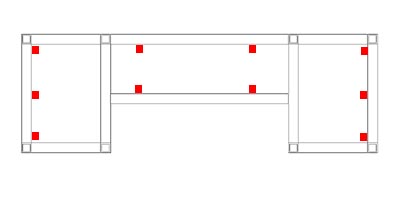
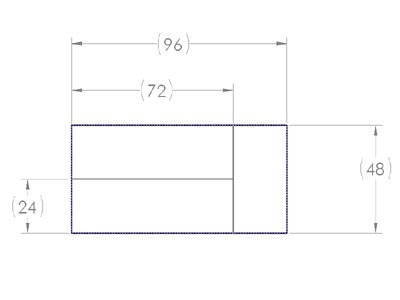
With the 2″ square tubing, this is what we are hoping to create…The overall Dimensions of the steel frame are approximately 36″ tall, 72″‘ wide, and 24″ deep
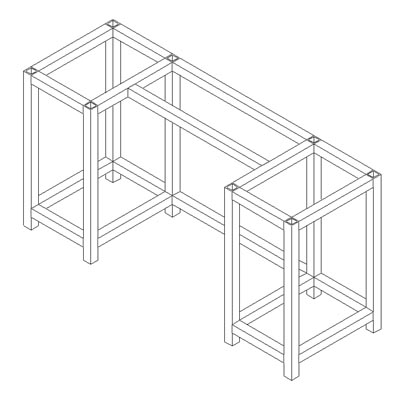
The cut list for the 2″ square tubing, for this particular bench.
– 8 pieces 36″
– 8 pieces 19-7/8″
– 8 pieces 13-7/8″
– 3 pieces 36″
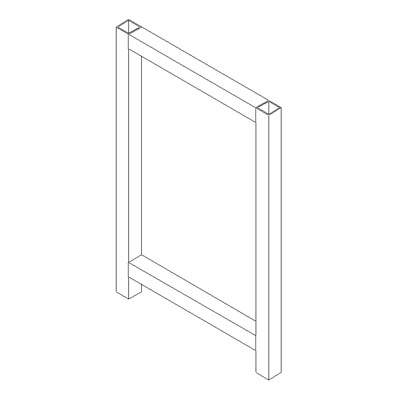
First your going to weld up all the 36″ and 19-7/8″ pieces to form the “legs” of the bench.
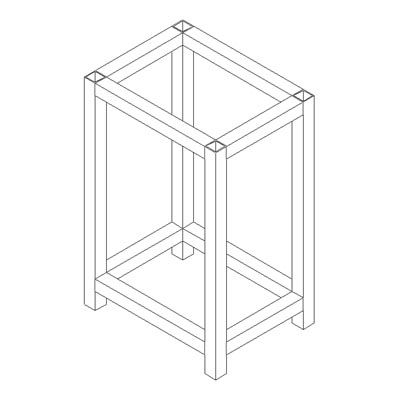
Once you have all 4 of these then attach the short 13-7/8″ pieces
After that, all you have to do is combine the two drawer banks to the 36″ pieces and you have a bench.
From here you gotta be able to attach the top to the bench itself, I made it simple with 1″ angle iron drilled with holes like this.

Put them in these locations…
Next comes the table top, I used some interior grade plywood from Lowes, Araucoply is the brand name, If you rip it down the middle and double it over, you will create a 1.5″ thick top.
To secure the two pieces together, you can use a bunch of 1-1/4″ screws from the bottom, or contact cement, either way, you just want to secure the two halves together, then sand and finish. Personally I like the water based polycrylic from Minwax, it dries fast and builds up quick for a thick layer, give this a couple days to fully cure, and read instructions on application.

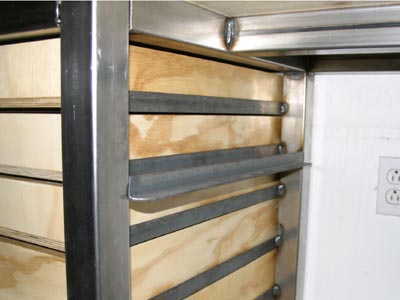
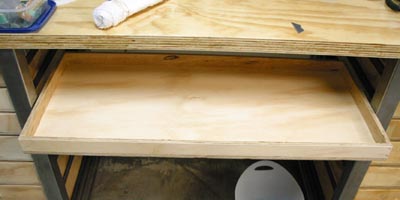
Now for the drawers, in this bench I took the hard way and installed angle iron runners for home made boxes to slide on, this is the same approach for the drawer tray. Not going into detail on this one, but if you have come this far, you can probably figure it out, here are some photos for reference. The nice thing, you can make your drawers any depth you want.
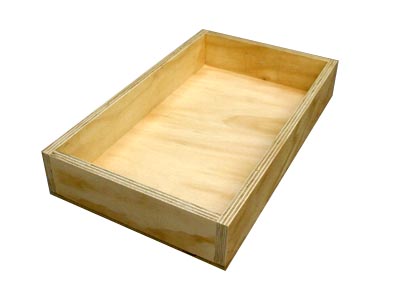
Drawers made from the plywood as well.
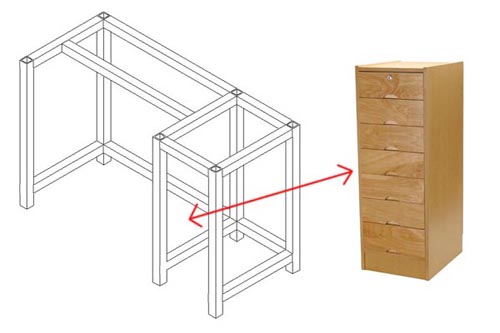
Alternatively, you can modify the design and buy a set of drawers from Rio Grande (Item Number – 113419)
Yeah, so there you have it. Remember I am a professional 😉 , if you try this at home, take all safety precautions. This bench will provide you years of service, and it will be heavy, something that is highly desired for stability and abuse.
Having built a number of these for the studio, it truly is a labor of love, as it is a lot of work. If you don’t feel like embarking on this journey, Sam’s club sells a very inexpensive, well built work bench for about $200 along with a matching tool box on wheels ($200). For the money, they are worth every penny.
http://www.samsclub.com/sams/ultra-heavy-duty-workbench/prod1490086.ip
http://www.samsclub.com/sams/ultra-heavy-duty-6-drawer-cabinet/prod2140859.ip
In the end its your call, enjoy life
patpruitt
Latest posts by patpruitt (see all)
- Filing it away… - December 7, 2013
- DIY Pro Jewelry Bench – Redux - February 10, 2013
- 3M Radial Bristle Brush (wheel) – new found faith – - February 7, 2013
patpruitt
Latest posts by patpruitt (see all)
- Filing it away… - December 7, 2013
- DIY Pro Jewelry Bench – Redux - February 10, 2013
- 3M Radial Bristle Brush (wheel) – new found faith – - February 7, 2013

{ 1 comment… read it below or add one }
Nice bench!! I love the look, and I bet it’s nice and sturdy.
You must log in to post a comment.