Lee Epperson
CONSTRUCTION METHOD
In the construction method of making a model various pieces of wax are shaped then the pieces are wax welded to other pieces to form the model. The construction model may be made from any combination of sheet, wire and carving wax.
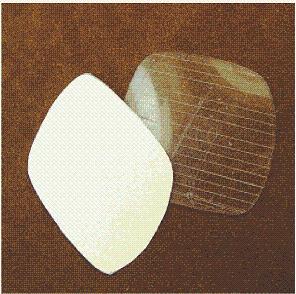
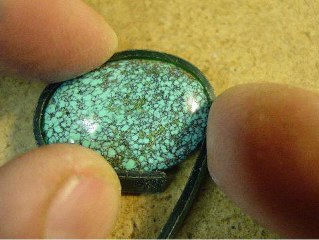
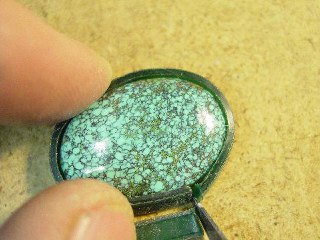
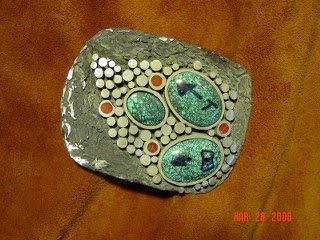
This paper will describe the construction of a buckle as shown in the photograph.

The size of the buckle will be determined by the maximum size of the belt it will be mounted on.
The width of the buckle where the loop is mounted must be slightly wider that the belt loop.
A loop of 10 gauge wire is bent around the center of the loop. Its function is to center narrow belts on the buckle.
The findings will be soldered to the cast buckle.
A piece of 16 gauge sheet wax must be cut out to the basic shape of the desired buckle.
The shape of the buckle is drawn on a card or similar piece of stiff paper. The shape is then cut out.
The shape is then drawn on the 16 gaga wax sheet by a pointed tool which is moved around the border of the cardboard shape.
If the shape is to be used many times a plastic template may be created.
The plastic shape of the buckle can be cut out with a jeweler saw. The edge of the plastic should be smoothed with a file. Lines were inscribed on the plastic to act as guides for some buckle designs.

A knife is used to cut the buckle from the wax sheet.
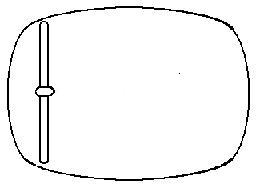
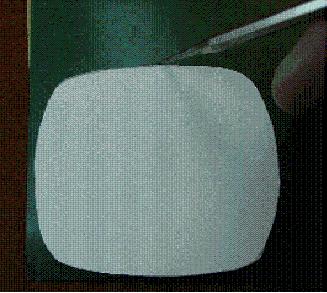
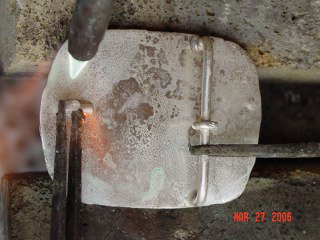
A buckle has a slight curve to fit the body. The curve may be formed by bending the sheet over a curved surface.
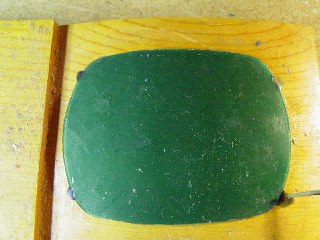
A piece of wood may be carved with the necessary buckle curve. This is recommended if many buckles are to be made. The wood acts as a support for the sheet wax.
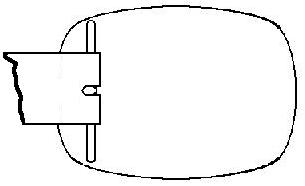
The sheet wax is formed over the curve on the wood. Spot weld the sheet to the wood. Note the tack welds on the corners.
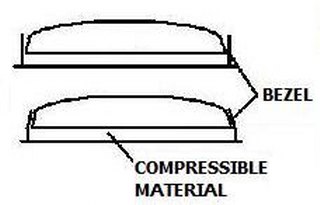
The design calls for mounting three turquoise stones on the buckle. The edges of all the stone cabs are cut at a slight angle. In metal fabrication work the bezel is formed to fit the larger dimension of the stone. The stone is then placed in the bezel on top of a compressible material. The bezel is then pressed against the stone which is pressed against the compressible material.
This works fine for pieces constructed from metal with thin gage bezels.
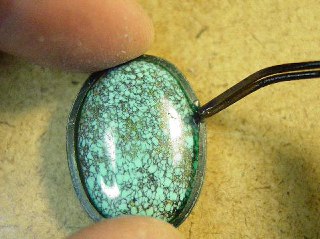
The edges of stones, used in a casting with a heavy bezel, must be ground so that the edge is vertical to the back of the stone. The bezel will not be pressed against the stone.
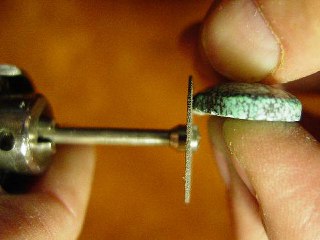
A silicone carbide cut off disc mounted in a hand piece may be used to grind the edges perpendicular to the base of the stone.
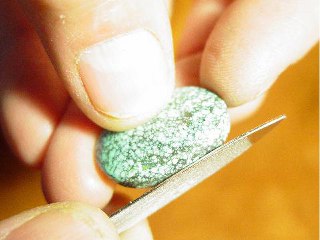
A diamond file may also be used to cut the edge.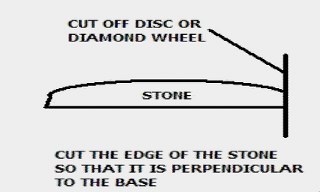
Several 1/8 inch strips are cut from the 16 gauge sheet wax. The knife will cause the edge to swell slightly slightly when the cut is made so it is best to cut the strips from the original edge of the sheet wax.
Cross section of the wax bezel:
The bezel strip of wax is bent around the stone. The process is similar to the process of forming a metal bezel. The wax is cut so that the bezel fits the stone.
The wax joint is wax welded. Any excess wax should be cut away.

The stones are temporally located where the design dictates. It is recommended to leave the stones in the bezel. Be sure the edge of the stone is exposed above the bezel so it can be removed from the bezel.
Wax weld the inside and outside of the bezel to the base.
Wax rods of various diameters will be added to the base. 1/8 inch, 1/4 inch, and 8 and 10 gauge wax wires will be added to the base. A jig is set up to insure all the rods are cut to the same length, which is equal to the height of the bezel.
The color of the waxes is insignificant as various wax vendor color their waxes differently,
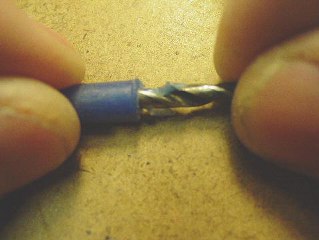
A hole is drilled thorough the center of the ¼ inch wire. Coral dots will be inlaid in these holes once the buckle is cast.
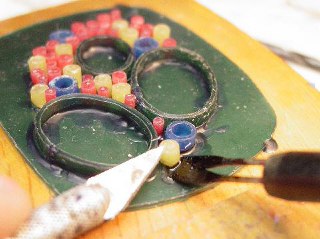
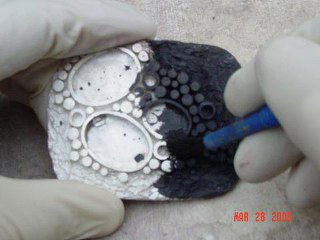
The pieces are wax welded to the base. The pieces are slightly sticky and will stick to the tip of a tool. The tool is used to locate the piece before it is welded to the base.
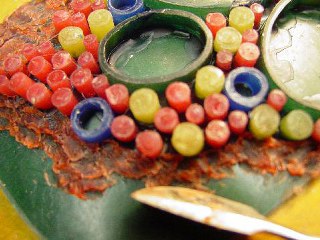
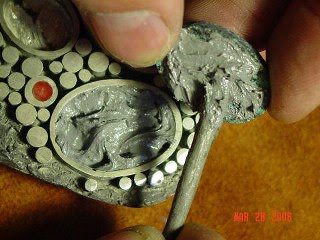
Once all the wire pieces are added to the base the background is textures. A spatula tool is used to paste sticky wax to the background. The tool is slightly heated before it picks up some sticky wax. The surface of the sticky wax may be smoothed or left rough depending on what type of surface is desired.


Sprues are added to the buckle and the sprues are wax welded to a flask base.
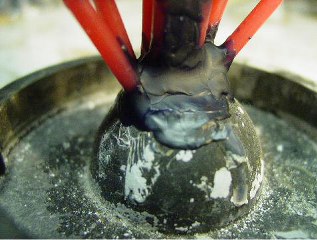
Add a wax fillet to all joints.
The buckle is cast. Once cast the sprues are removed and the portion of the sprues remaining on the buckle are ground flush with the buckle.
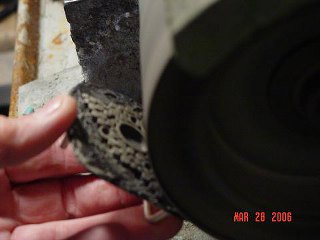
The back of the buckle is polished with tripoli the wiped clean with alcohol to remove oils and grit.
Several lines are marked on the back of the buckle with a Sharpie felt pen.
The entire piece is covered with Cupronil then the buckle findings are soldered to the back of the buckle.
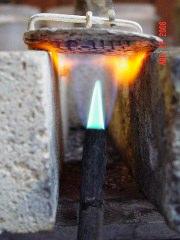
The buckle is mounted on two fire bricks so that the torch can be played on the back surface. The buckle is heated from the underside until the pen marks disappear.
Once the pen marks disappear the torch is played on the joint of the belt loop and buckle. The loop is wire soldered to the buckle. The keeper is soldered to the loop.
The buckle is oxidized.
The bezel and rods are sanded with wet 600 grit sandpaper.

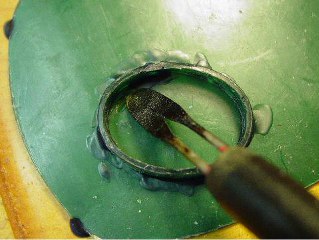
The inside of the bezels are roughed up with a burr. The inside lower edge of the bezel is undercut slightly. The undercut will provide a lock for the epoxy used to hold the stone in the bezel.
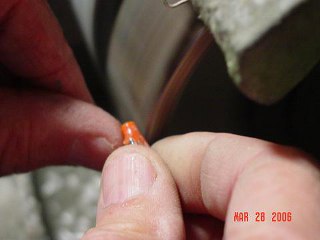
Branch coral is ground to a round shape to fit into the smaller bezels.
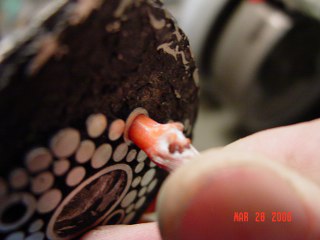
A dab of instant glue is placed on the coral once it fit’s the bezel. The coral is then placed in the bezel.

The coral is cut with a diamond saw close to the top of the bezel. Coral has a tendency to break into the bezel. To prevent this the coral should be slightly cut on one side then cut on the other side. The coral is then ground and sanded flush with the silver.
The stones are touched up with a diamond wheel till they fit the bezel. The stones have to be marked to match the bezel they will fit into.
Epoxy is mixed and placed in the bezel and on the back of the stone. Place any remaining epoxy aside. It can be checked later to test its cure.
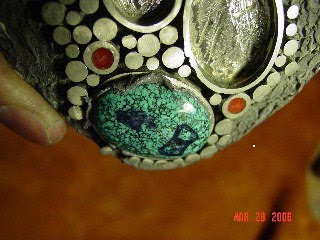
The stone is then pushed lightly into the bezel. Epoxy will be forced out of the bezel. The excess epoxy should be scraped away with a screwdriver or similar tool. Continue to press the stone into the bezel and clean up the epoxy until the stone is set properly.
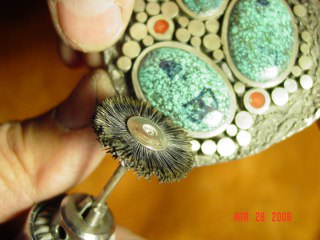
Once the stones are set in the bezel the remaining epoxy on the bezel and stone may be removed with a bristle brush mounted in a cable driven hand piece. The stone and bezel should be slightly whetted.
An abrasive wheel mounted in the hand piece may be used to remove any epoxy after it has cured on top of the bezel.
The buckle is then polished using normal jewelry polishing techniques.
The polishing compound that is embedded in the recesses may be removed with soap, a tooth brush and water. Crest sells a battery powered toothbrush that has both a rotary and oscillating section. It works very well in removing polishing compound.
leessilver
Latest posts by leessilver (see all)
- CASTING PAPER UNDER CONSTRUCTION - October 30, 2010
- CASTING PAPER UNDER CONSTRUCTION - October 30, 2010
- PAPER NO 4 CREATING LARGE JUMP RINGS - October 15, 2010

You must log in to post a comment.