TEXTURES IN WAX
By
LEE EPPERSON
This paper will describe and show various textures that I produce in wax and on the finished silver.
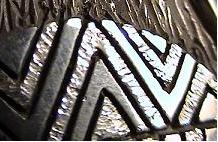
WAVE TEXTURE

This texture is produced with a hand made tool mounted in a cable driven hand piece. I do not have a picture of the result.
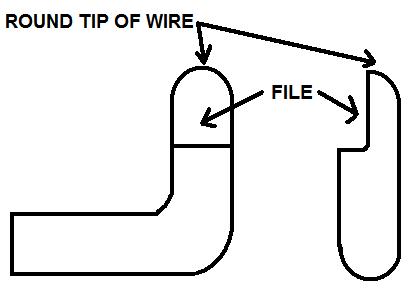
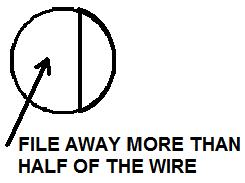
The tool is formed from a 10 gage silver wire. A piece of wire is bent 90 degrees. File a flat section on the tip on the wire as shown. Round the tip of the wire.
The wire is mounted in the chuck of a hand piece. The hand piece is moved up and down and left and right so that the tip gouges out grooves in the wax.
The texture can be changed by changing the length of time the tip of the tool is held against the wax.
ROUND BURR CUT TEXTURE
This texture is produced with around burr mounted in a cable driven hand piece. The burr is bounced into the wax. Do not allow the burr to run in a line in the wax. The texture can be varied by changing the burr size.
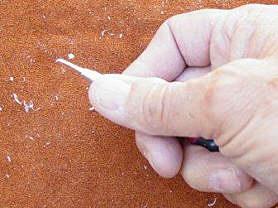
PALLET KNIFE TEXTURE

The texture shown here is produced with sticky wax and a dental tool. Sticky wax is placed on the pallet knife like dental tool. The sticky wax is the spread on the wax model. The texture can be varied by changing the way the sticky wax is spread on the model.
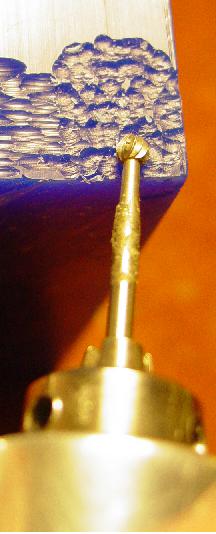
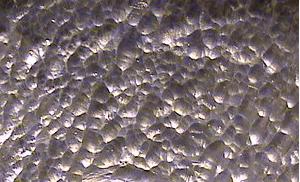
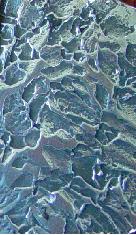
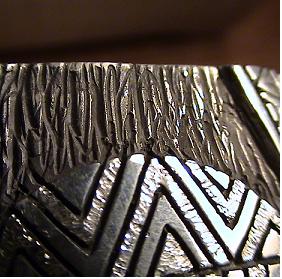
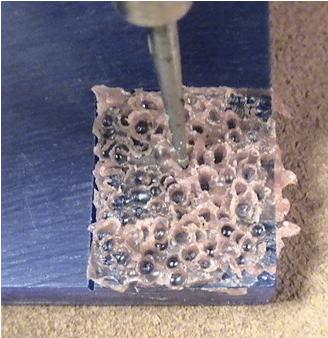
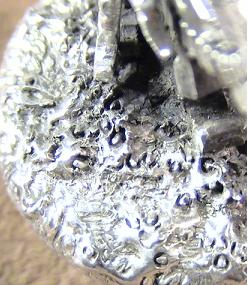
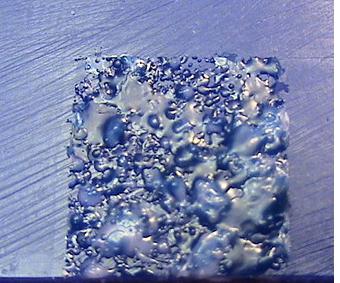
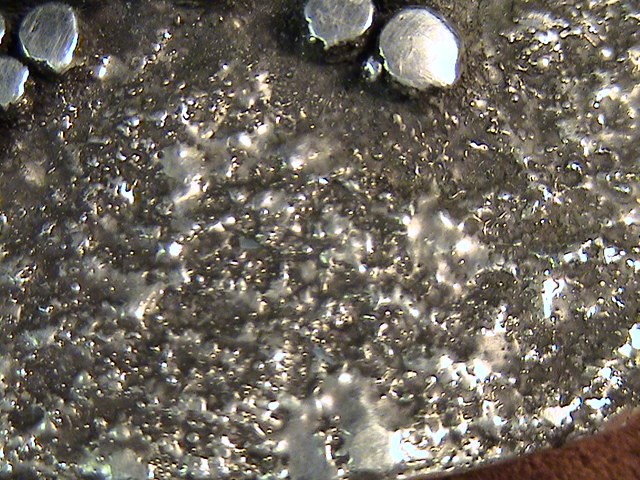
A grainy sand cast texture can be generated with a modified dental tool. The color of the textured silver can be varied depending on how much the area is polished or brushed after being oxidized.
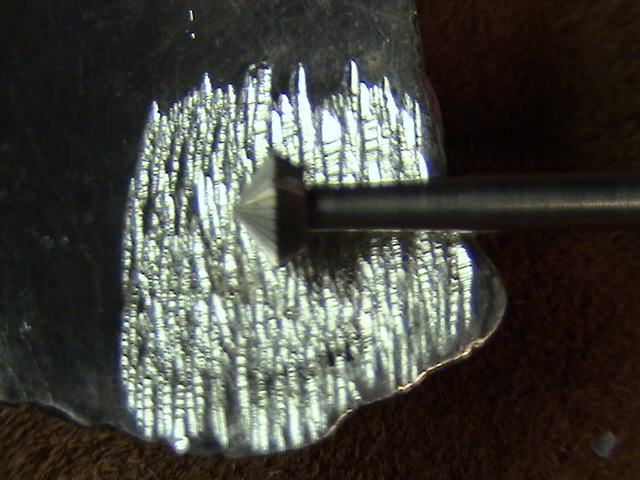
SAND CAST TEXTURE
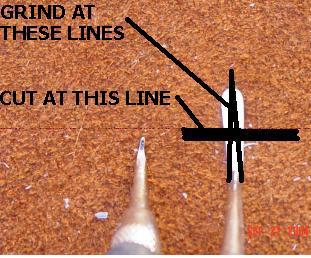

The tip of the dental is modified as shown in the photos above.
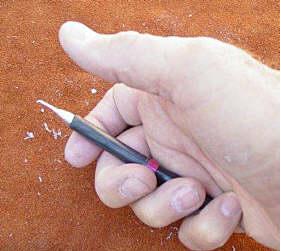
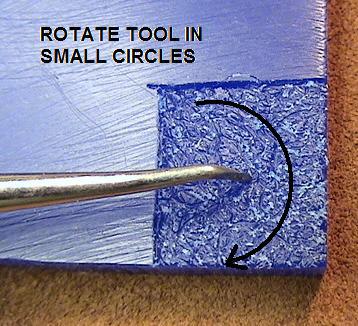
This is how the dental tool is held. Then tip of the tool is pressed against the wax and is rotated in small circles.
WALNUT TEXTURE
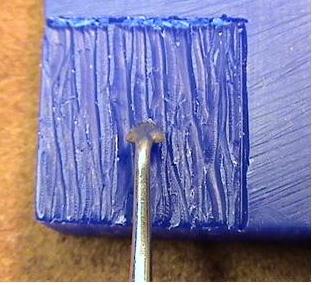

The tool is continually drawn through the wax until the desired texture is obtained.
The photo on the right shows the shape of the dental tool that is used to produce this texture.
NO NAME JUST USE.
(One of me karate instructors would always say that when we would ask him a name of some technique. It seems to work here. LOL)
This texture process produces a very rough feathery surface. It is produced by putting sticky wax on the model then heating a tool and pushing it into the wax. The final texture will depend on the size of the tool and the depth of the wax.
SPATTER TEXTURE
This texture process causes a bubbly texture. It is created by melting wax on a pallet knife. The pallet knife is held in one hand and the blade is pulled back then released above the model. This will cause the melted wax to be thrown onto the model causing a spattered affect.
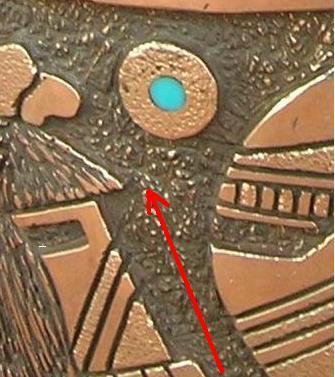
HAMMER TOOL TEXTURE
This texture is produced after the model is cast and polished. It is produced with a cable driven hammer tool with a pointed tip.
The tool hammers dimples into the metal.
BURR CUT TEXTURE
This texture can be varied by using different burrs with sharp edges. Again the hand piece is moved up and down and sideways.
This is a quick look at various textures.
Good luck,
Any questions please contact me.
Your Orchid Buddy
leessilver@aol.com
leessilver@cox.net
602-993-4766
leessilver
Latest posts by leessilver (see all)
- CASTING PAPER UNDER CONSTRUCTION - October 30, 2010
- CASTING PAPER UNDER CONSTRUCTION - October 30, 2010
- PAPER NO 4 CREATING LARGE JUMP RINGS - October 15, 2010

{ 4 comments… read them below or add one }
I appreciate this, thank you for sharing!
Wow, can’t wait to try working in wax now that I have seen all those fabulous textures. Jan Arlene
Great post. Carving wax is an art all by itself; seeing different techniques is interesting.
Very interesting. We always like to see new ways of doing stuff:) Thanks for posting this!
You must log in to post a comment.