There are exactly 4 ways to break a Princess diamond, so easy and yet so expensive. If there is no care taken, this can happen to you!
My essay along with many photographs will supply you with the answer to how breakage will not occur! “Pictures speak louder than words”! …Gerry!
“Princess Diamond, 4 – Claw Setting” detailing the required setting tools!
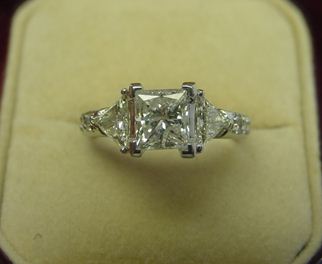
The whole idea of setting this particular stone is to hold, secure and above all to prevent chipping the four delicate corners of the Princess diamond. So how do we accomplish this maneuver? With great setting skill, hard work, Triangular files of #2 and #4 cuts, small round burs of #006 – #008, flat edge and tapered Pumice wheels of #180 grit, cup burs of a size that will cover the claw tips, and above allsheer luck! Even today my heart races at times when attempting the inevitable, it seems almost an experiment in futility in setting these darn delicate stones. So you are not alone!
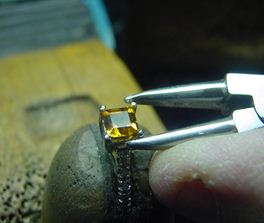
Every time you pick up a stone to set, you must always examine the four corners. The pavilion, check the corners themselves, the culet, table and surrounding crown facets. If any inclusion is seen near the “workable area” of this Princess stone, it must be then immediately reported to ther management, or dirctly to the client.
Hold your diamond on the straight areas of the stone, NEVER ON THE CORNERS! You have 4 chances of breaking the stone, one for each corner! Spend a bit more time on the following styles of cuts, also included should noted the Marquise, Pear Shape and Baguette fall into this category too, all worthy of closer inspection. Look everywhere with your 10 power loupe! The time you spend here is worth the time lost in re-cutting the stone because you might have missed an inclusion not seen at this moment. Be very critical in observing any inclusion, and inform your client of any minute defect seen by your loupe.
You might be saving yourself tons of money because if you don’t observe any telltale defect, the client will legally say it was you to be blamed. It could be legally and probably your fault.” Leave no stone unturned!” Now that the preliminaries are over with, we can forge ahead to the actual setting. Secure the ring in your clamping device, ultra secure. No movement of the ring should be apparent as later as we are securing the claws. It is not wise to slip the ring around the clamp with this devilish stone. I usually secure the ring-clamp tighter for this procedure!
Next, open up the claws a bit wider to accommodate the easier accessibility of your burs. Do not worry at this time if the claws are out of alignment, we will surely rectify this at a later time. Arrange at your bench top with only the tools you need. Clean off the little unnecessary items that will hinder you from grasping the next tool you need!
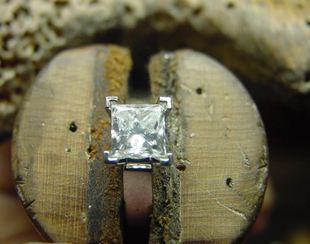
CLEAN!
With the Round Bur of only #008 start the drilling at a level of only 1/3 from the claw tip, a nice “almost” deep hole. This hole must NOT exceed any further than 1/3 the depth of the claw. The remaining depth is to hold, secure and to maintain wear and tear for years to come. Next procedure comes with a smaller use of a round bur of #006 size. This is generally used for creating a placement for the corner edge of the pavilion angle-cut to sit, or lean against. From the center point of the initial deep indentation, cut with your bur halfway down that claw. Now with this step, you are having a nice ‘resting spot’ for the pavillion. For the claw to cover the Princess stones’ corner securely and to have that claw mold itself around the corner we must make two slight side cuts on either side of the initial #006 round bur hole.
I would use only in this operation smaller 006 bud shaped bur to make these two little grooves, but here is the clincher. They have to be the same width as of the diamond. If you intend to make these two grooves a bit wider, you will definitely waste too much of the important holding metal of that claw.
Care in this particular operation is of the utmost. Always examine what you are doing with your 10x power loupe. After a few thousand stones you might get rather proficient in this setting and you will speed up a tad. Well here comes the best part, how do ‘we’ and you get those stones ready for setting.
Place your loose stone in the setting, re-align the claws back to the vertical position. I would use right now a short jaw pair of pliers to do the actual moving.
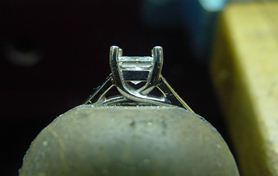
DO NOT LEAVE ANY MARKS IN THE PLIER-JAWS. THOSE MARKS WILL BE EASILY TRANSFERRED TO THE METAL!!!!
One of the most important features or methods of tightening Princess stones is NOT to use the pliers at 12:00-6:00 o’clock positions. Why? You might be giving undo stress to the opposing corner of the stones. I find it a lot easier to give slight tightening squeezes to the 3:00 and 6:00 o’clock claws. I usually remain quite calm in knowing that all of the bearing cuts initially have been done prior o this stage of setting, at this time. NO difficulties or problems should arise now. You might use your copper or brass pusher and close up each individual claw towards the corner in question, while securing the opposing claw against your bench-peg. Repeat each of these two moves as you move each corner gently and carefully and being quite slow in your handling of the claws. At all times you should be aware that initially some of the claws might be out of alignment. Please use your smooth jawed pliers and quality check for marks afterwards.
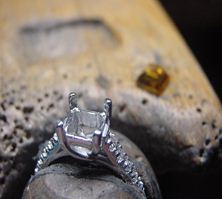
When you are starting to “file to trim” the claws, every aspect of this is so important. Please select your Triangular files, #2 and then the finer #4 cut, 20 cms in length!
These two files are chosen for their intricate filing surfaces that is to take place!
File the sides of the two sides of each claw, we need to reduce the overal thickness as it appears to the customer. We then need to reduce the front section of the claw, we don’t need to much metal covering the facets of the stone. We do need security at all times!
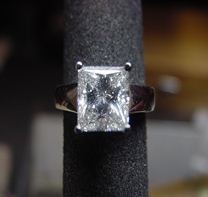
If you are setting with round claws, as shown above, you may use a Cup ‘shaped’ bur and trim to a rounded-shaped appearance. Finally use your Pumice wheel all over the ring, You must remove all markings that are noticable prior to the polishing procedure. …Gerry!!
Gerry Lewy
Latest posts by Gerry Lewy (see all)
- Bead Setting, Bright Cutting, Pave aka Cut ‘n Bead - December 26, 2012
- Symbiotic Relationship between Rough-Cutting and Bright-Cutting - September 8, 2012
- Princess Diamond, 4 – Claw Setting - August 27, 2012

{ 2 comments… read them below or add one }
I found that a “Sharpie” marker can be your best friend. When you are ever so close to having a perfect fit, (And sometimes many times before then) color the prongs “black” then gently set stone in place
(I usually put a dot on the top of the diamond so I always put it in the head the same way ) and wiggle around a little, then remove the stone and see what was “scratched off” the blackness and work that area with a small ball bur.
Seems they try to break the closer you are to set. This takes away that “Being off by a wrong hair”
Really helpful post