Skip to content

Hand Engraving– the Ultimate Jewelry Decoration

Opal and Sapphire butterfly ring

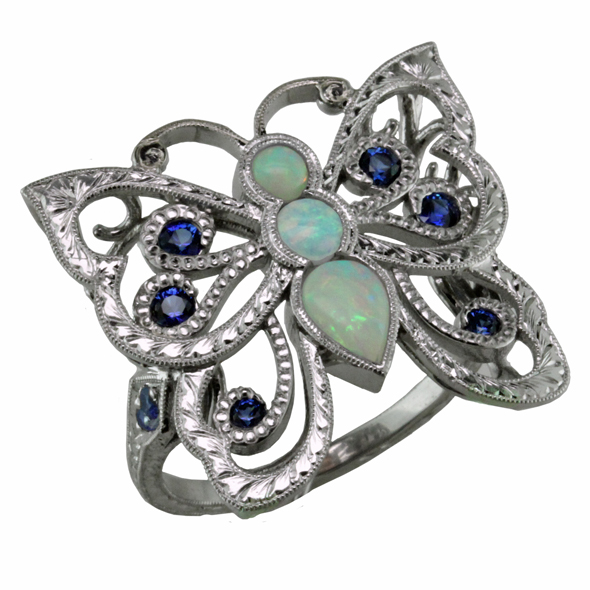
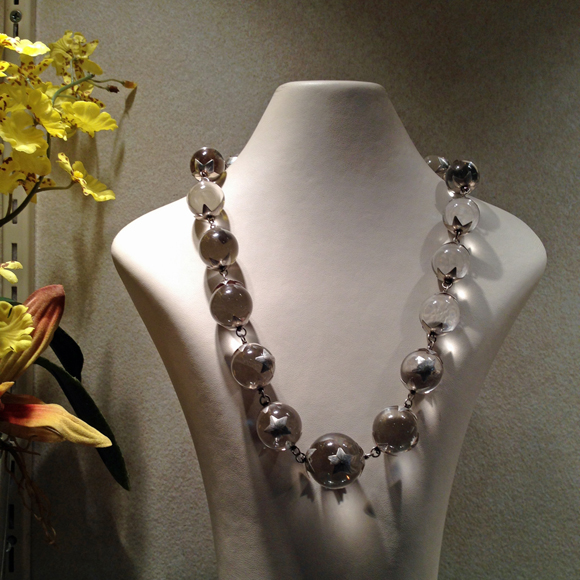
Custom Ring, Opals and Sapphires in Platinum with Hand Engraving

In today’s world, some things change rapidly and some stay the same. Just in the last 20 years or so, jewelry making has changed radically. Previously we used labor intensive processes like carving wax models by hand to create our original designs and master models. We now use technological marvels like computer aided design and modeling (CAD/CAM) and 3d printing as a mainstay to make jewelry. Yet for all the efficiency of these new manufacturing methods, we still rely on centuries old technologies like hand engraving to add the final touch to our finest pieces.

Hand engraving is a decorative art form where designs are carved into the surfaces of jewelry, housewares, knives, guns and other objects. Hand engraving is also used to create the metal plates used to print paper currency and other legal documents.

Currency image

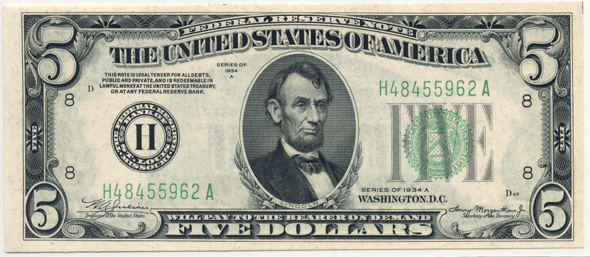
Hand Engraved portrait of Lincoln

Almost anything can be depicted by a skilled hand engraver. The finished product is a product of the engraver’s design sense, imagination and skill level. Hand engravers spend years perfecting their skills– some specialize in decorative engravings, some work mainly in lettering and inscriptions.

Hand Engraved Knife

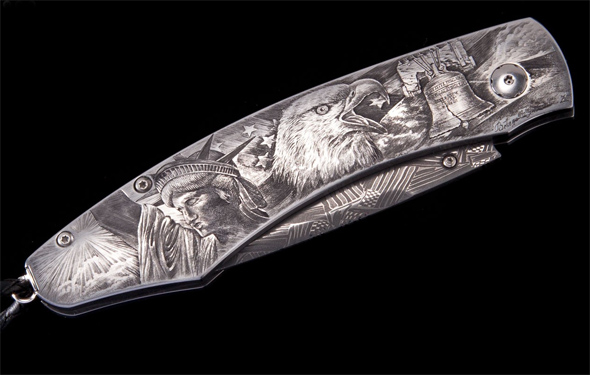
Exquisite Hand Engraving on William Henry folding knife

The main tools the engraver uses are very sharp tiny steel chisels called gravers. For jewelry, the engraver uses different shaped gravers to create various designs and patterns of leaves, flowers, curls and swirls .

The beauty of hand engraving lies in its crisp detail and brightness. Unlike engraving for currency where ultra-fine lines make up the design, the jewelry engraver adds wide grooves and notches to reflect light and brighten the surface and the gems. His gravers are sharpened on a diamond hone and polished to a mirror brightness so that the cut surfaces are bright and shiny.

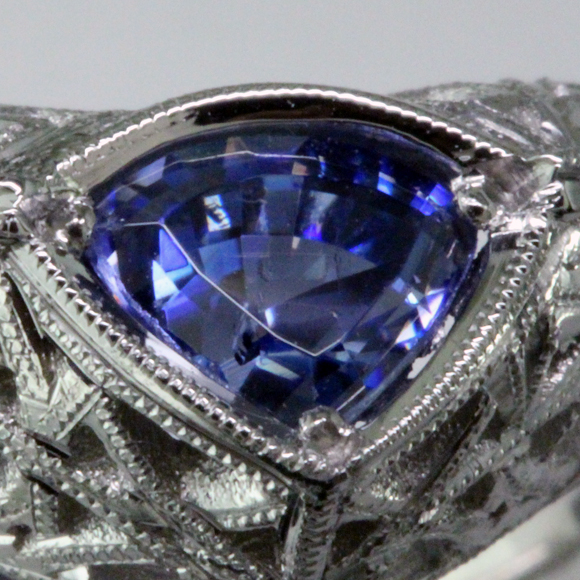
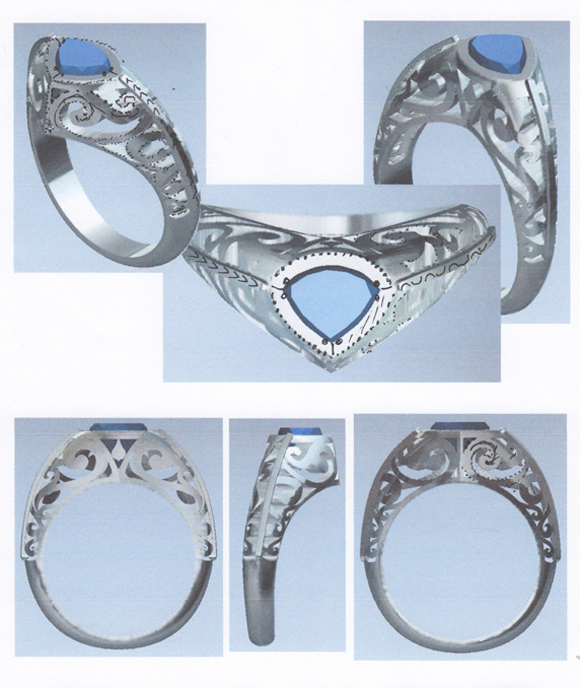
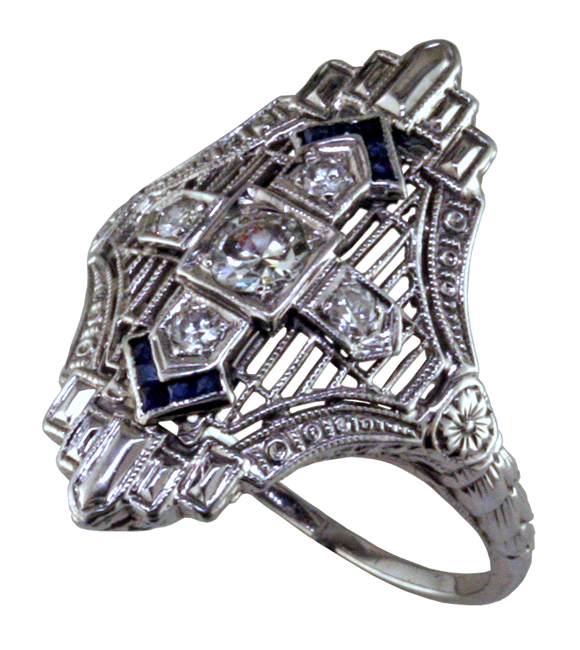
We recently created a custom ring for a client featuring the diamonds from her original wedding ring. She wanted a new look with white gold instead of yellow and she liked classic vintage styles. Engagement rings of the late 19th and early 20th century often featured lots of beautiful hand engraving. Here’s her ring, before engraving and after.

b4 & aftr

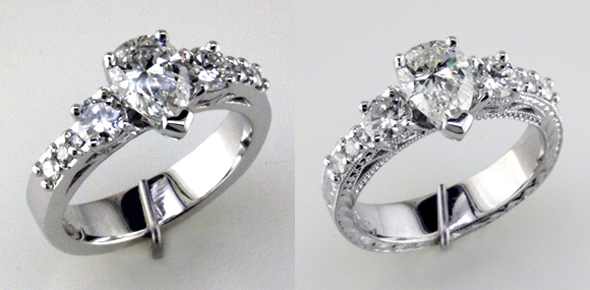
Custom Ring, Before and After Hand Engraving

We think the hand engraving really transformed the ring into something special

Hand engraved reverse

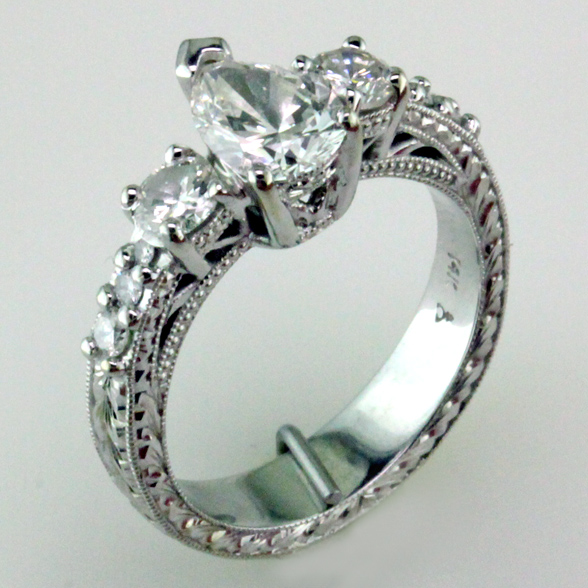
Hand Engraved Custom Ring

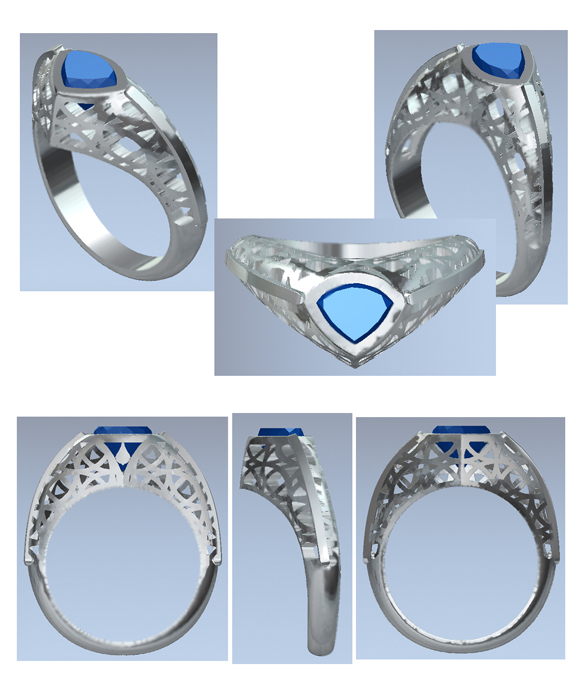
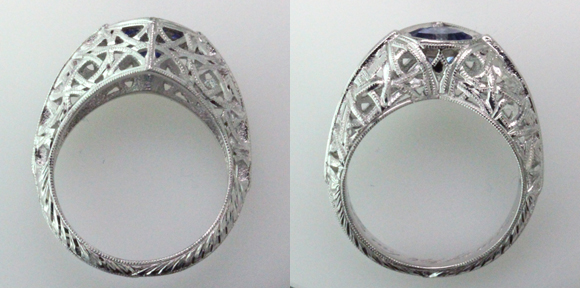
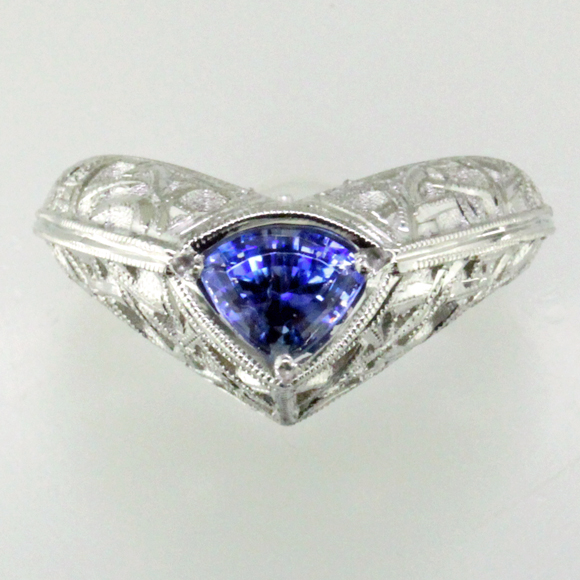
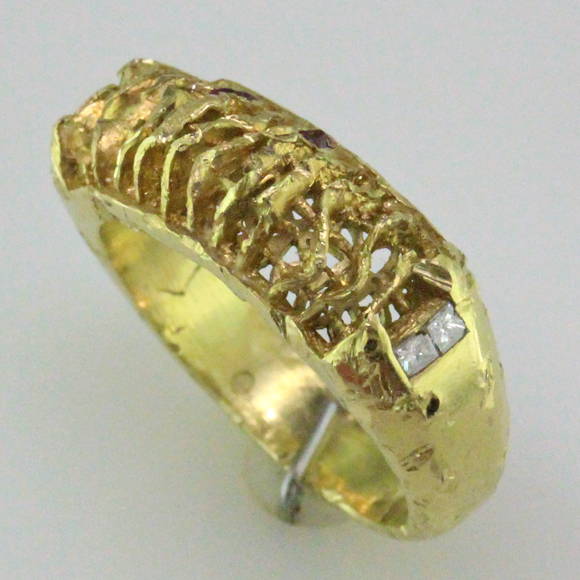
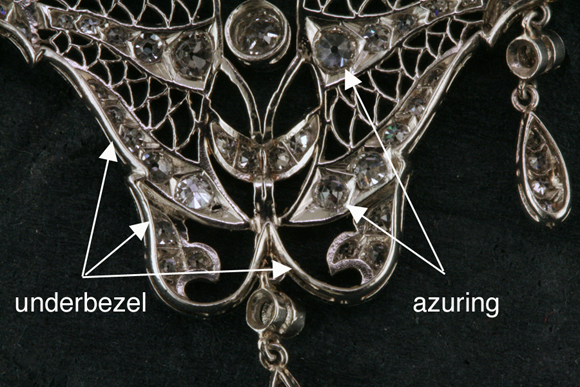
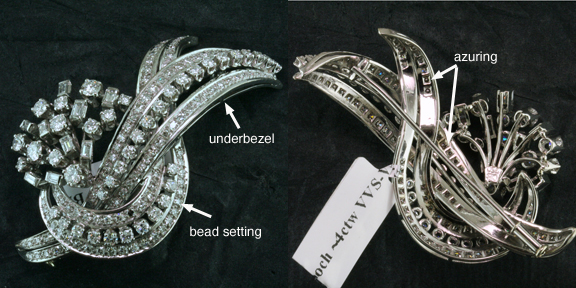
Some jewelry makers have tried to add a hand engraved look to their mass produced products. They use CAD/CAM to decorate the surface of their master model, then make a mold to make reproductions of the original. In our opinion, this look really doesn’t have the class and elegance of real hand engraving.

False engraving 1

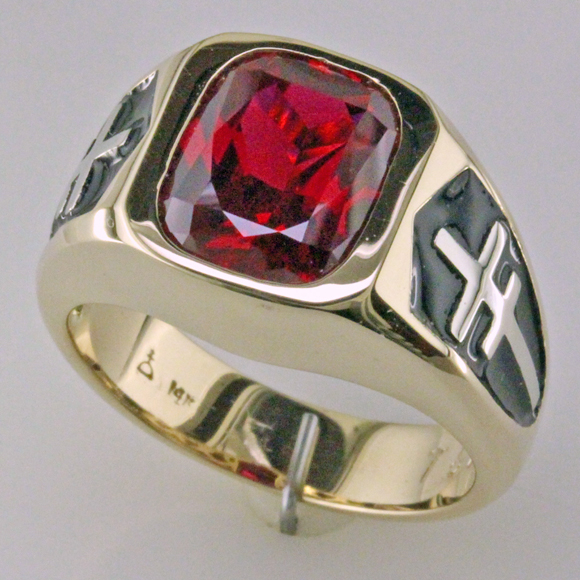
Faux Engraving- Cast

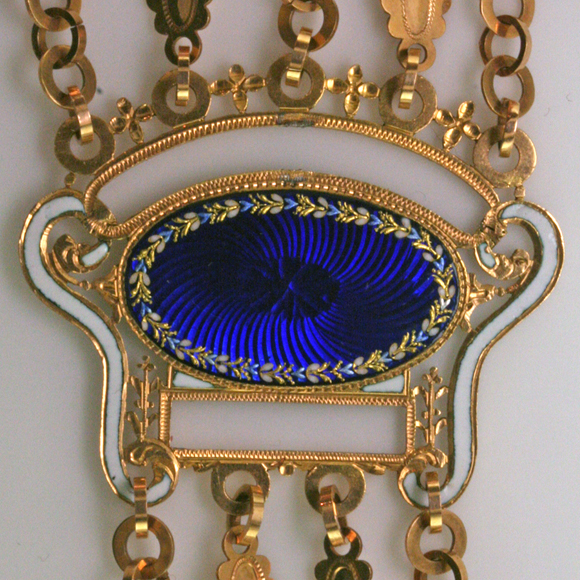
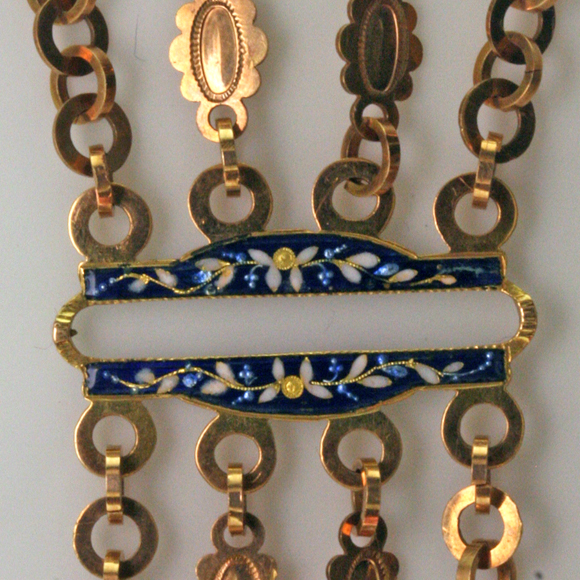
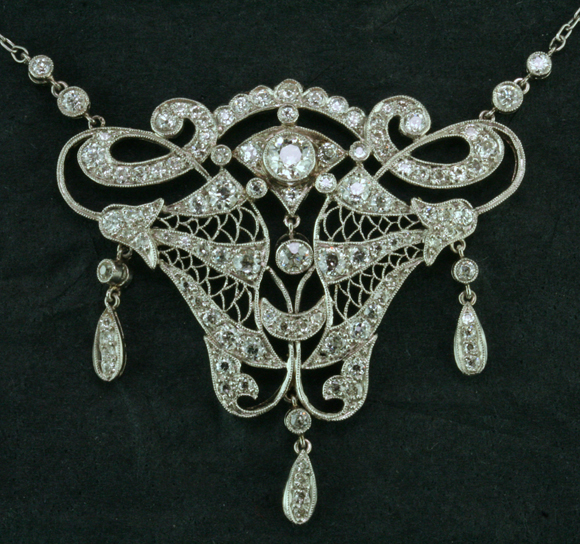
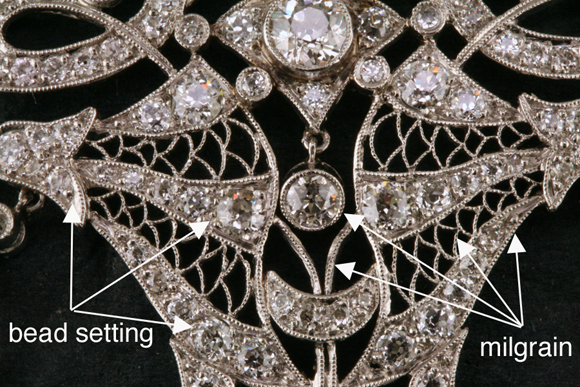
At Mardon, you’ll find the real thing, on both our original creations and our custom designs. We use traditional surface decorations like hand engraving and jewelry enameling to enhance our one of a kind jewelry and our custom designing.

PigeonBlood Ruby Ring 3-4 view 1

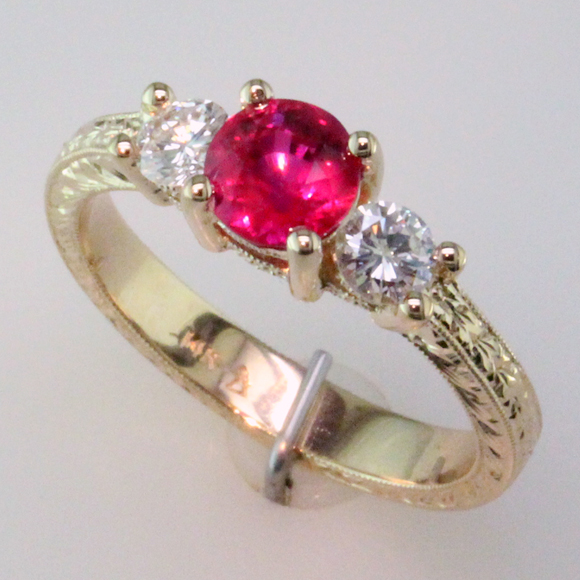
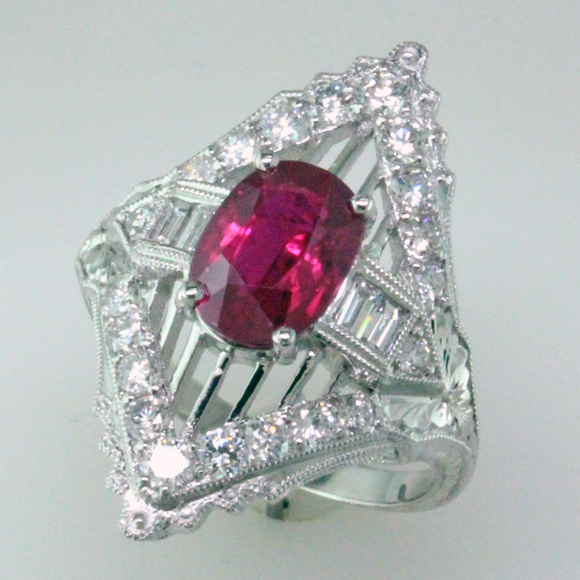
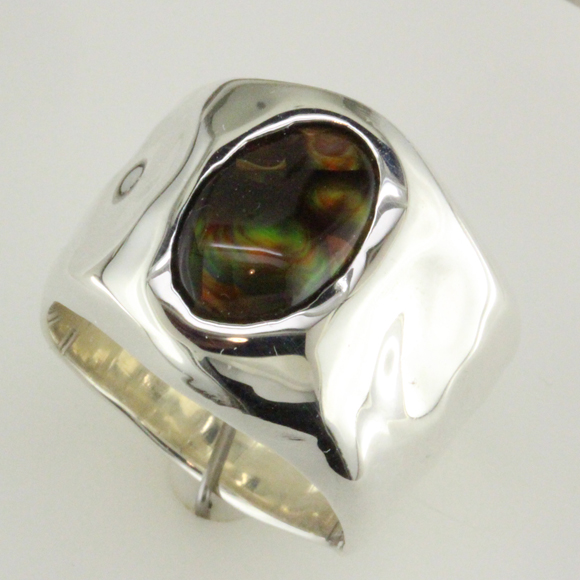
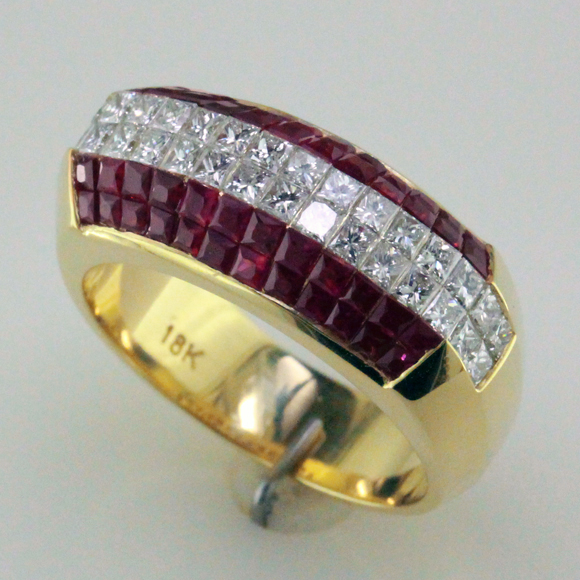
Mardon One-of-a-Kind 14K Yellow Gold Ring with Ruby, Diamond & Hand Engraving

As full service jewelers, we work daily with the dedicated artisans who keep these timeless skills alive. Stop by the shop to see what a difference these traditional techniques can make in our hand crafted jewelry.

Benitoite & Platinum Engagement Ring–Strictly Custom

Benitoite 3:4 blog

Just back from the shop, this stunning Benitoite & platinum engagement ring was made to order for our client R. This young man truly went the extra mile to create this symbol of his love for his fiancé.

Wanting something beautiful, exotic and rare, he chose Benitoite. Our California State Gemstone is all of that. One of the rarest of all the gems used in jewelry, Benitoite is found only in one small mining area in San Benito County, California. Benitoite is famous for it’s beautiful blue color and it’s flashes of rainbow colors.

He’d read our blog about a Benitoite engagement ring and contacted us, looking to acquire a nice Benitoite. We showed him several stones from our contacts in the gem trade, but they weren’t  “The One.” A diligent researcher, he found a lapidary in Central California who cuts this rare gem. R. drove hundreds of miles to a gem show to meet this cutter where he was able to purchase this beautiful triangular step cut stone.

Benitoite closeup 2

R. was raised in Wisconsin but is of Middle Eastern descent. He wanted the ring to have a vintage filigree look with a Middle Eastern flavor. Since his stone was triangular, we started from a ring design from my portfolio that was V shaped. Working from images he sent, we developed this first design featuring the curls and arabesques of the mandala.

Mandala 1


First try_edited-1After seeing the first rendering, he wanted a more geometric look to the open work and sent this mandala with an Ottoman design.

Mandala 2

Very difficult– we had to adapt a flat two dimensional design meant to cover a large area such as a window screen onto a very small three dimensional object with multiple curved surfaces. The tolerance for casting platinum are tricky– we had to balance the delicacy of the filigree with the dimensions required for casting the ring successfully. After hours of work, our CAD wizardess Jenny created this striking design.

Design 1

The CAD rendering can really help our customers visualize the final product. With his approval of the design, our platinum smiths went to work and created this wonderful ring.

He wanted me to send him a picture of the finished piece, but I asked him to wait to see it in person. With a design like this, the actual gemstone and the final hand engraving are what makes the piece come alive– no photo can really capture the beauty and presence of fine jewelry like this. When he saw the ring, his eyes lit up– he was glad he waited!

Front & back xBenitoite z

We were lucky to have a client who had the vision of something beautiful and special for his fiancé. Once again, our design team has been able to rise to the occasion.

Thanks to technology, we can do custom work for anyone with internet access. The CAD renderings allow a precise fit between your dream and the real jewelry piece. Stop by the shop in person or visit via internet or just give us a call. We’d love to hear your story, see your vision. We’re open Tuesday thru Saturday, 10 – 5:30 Pacific time.

The Creative Process in Us All

Wolf Paw ringThe creative process is one of the things that makes us human. All of us have creative impulses and abilities. From the raw data of our senses and our life experiences, our minds build ideas based on thought, image, and emotion. We use these ideas in our daily life for such mundane things as everyday speech, signing our name, or making a sandwich. We express them more permanently through literature, art and music. At Mardon, we’re privileged to participate in the ideas and creations of our clients.

Recently, daughter Jenny worked with Fabian to create this unusual and striking custom ring. Fabian’s idea was to make a silver pinky ring in the image of a wolf paw print. At the Tucson Gem Shows, Jenny and husband Scott had purchased some very beautiful Oregon Sunstones and a nice group of 4 matching rainbow moonstones. It was a natural transition to use these interesting gems to represent the pads of the paw– the creative process in action.

(Continued)

Rare Art Deco Pools of Light Necklace– with Stars!

BLOGPools w flowers

Striking Pools of Light Necklace

We acquired this highly unusual Art Deco Pools of Light necklace almost by accident. We recently purchased an estate of wonderful early 20th century jewelry items, mostly rings and pins. This piece and another interesting rock crystal necklace were included in the group. Since they had no gold content, we didn’t think too much about them and paid only a nominal amount. The wonderful thing about the jewelry business is that we learn something new everyday– in this case, we’ve discovered that this piece is a valuable Pools of Light necklace. (Continued)

Custom Rings Show Mardon’s Expertise and Versatility

Deco Ruby 3:4

Platinum Custom Ring with 2 ct. Ruby

These three recently completed custom rings show the versatility and craftsmanship of the experts at Mardon, in particular our gemologists, custom designers and hand engravers.

The spectacular platinum custom ring shown above is set with a 2 carat natural ruby that we brokered to our clients. Gemstone brokering means that our gemologists find a gem that meets your requirements from our network of gem traders and importers. Much like your stock broker or real estate broker, we’re able to find extra good values in the market place and we charge a straight commission for the service– in this case, saving our client about $3000 over what they might have paid for a similar stone at retail.

Our client had several jewelry items that she no longer used which were set with good quality diamonds, so we designed the new piece using her diamonds. She wanted something with a vintage look and spotted this Art Deco ring in our estate department– we used the vintage ring as a model for the new look.

vintage-diamond-synthetic-sapphire-ring-22905b

Vintage Art Deco Ring

We adapted the basic look to the new ring design and created CAD renderings for her approval. After several tweaks to the CAD, we sent the design, the ruby and her diamonds to our platinum smith for casting, setting and finishing. Notice how the beautiful hand engraving sets off the design.

Deco Ruby Side

hand engraving with milgrain

We designed this next ring for a gentleman who is a car collector.  He wanted a large sparkly ruby, but gave us a budget of several thousand dollars, so we suggested a Chatham Created Ruby. He wanted a particular cross decorating the sides so we had him draw a sketch and worked from that. He wanted a dark shiny area around the cross so we used a special black enamel to highlight the area. We think the ring is striking, and he loved it.

Men's Custom Ring 3:4

Chatham Ruby in 14K gold

Designer Jenny created this free form design in silver for a baroque shaped Fire Agate belonging to the client. He wanted a simple wide band that was organic like the gemstone, and was very pleased with his new ring.

Silver Fire Agate custom ring

Fire Agate in Silver

The charm of custom jewelry is that it is so personal and unique. At Mardon, we encourage our clients to participate in the fun– designing something new and fresh can be very fulfilling. Stop by the shop or send us an email to customerservice@mardonjewelers.com– we’d love to hear about your dreams and ideas, and will be happy to give you a free estimate of cost. We’re open Tuesday thru Saturday, 10 am to 5:30 pm.


The Resurrection of a Ring


Damaged ring, 3:4jpg

Fresh from the garbage disposal!

We recently completed the resurrection of a ring that had been severely damaged.

Fine jewelry is made from precious materials that when properly cared for, will last for centuries. Gemstones are durable and ancient– diamond crystals are typically 1 to 2 billion years old. Gold is eternal. It doesn’t deteriorate and is never discarded– if a style or use becomes outdated or obsolete, gold is simply recycled into a new item. The gold ring on your finger almost certainly contains gold from ancient times, perhaps from the tombs of the Pharaohs!

But even the most well made ring will not survive the ravages of a garbage disposal! Our client accidentally dropped this and several other rings into her fast spinning garbage disposal. Can you imagine the screams of anguish over the grinding racket?

After she recovered emotionally from the catastrophe, she came to our shop and asked us to reconstruct the ring. Fortunately, we had seen the ring before the accident and she had the remains shown above. Even luckier, four diamonds remained — we could measure and grade them so the new ring would be up to snuff.


Invisible setting diamonds and gemstones requires special tooling and techniques so we worked with a specialist to make the new ring. The rubies had to be specially cut and fitted to follow the complex curve along the sides– each stone is actually a narrower at the bottom, a trapezoid shape rather than a square like the diamonds across the top. Our client wanted an exact duplicate so we used CAD to recreate the ring precisely– here’s the working  CAD

Original CAD

Working CAD rendering


And here’s one of the CAD renderings we showed our client

Rendering 3-4

CAD rendering for client


Anytime you try to recreate something, whether a physical object or an experience, you hope to get as close as possible. But as the saying goes, you can’t step into the same river twice. We think we managed to rise to the occasion.


three vertical ruby rings


New, 3:4

The Rebirth!


Happy to say, our client was very pleased.

At Mardon, we welcome challenges like this. We rely on our state-of-the-art technology and years of experience making fine custom jewelry to be able to satisfy the needs of our clients. And custom jewelry can be quite reasonable. We make the item from scratch, our high-tech process is quite efficient and by dealing directly with the maker, you don’t pay any extra markups.


Antique Yogo Sapphire Pin

Yogo Pin w-pin

Antique Yogo Sapphire & Diamond Pin

A client inherited this gorgeous antique Yogo Sapphire pin and asked us to appraise it.

Sapphires were known to occur in several areas of western Montana as early as 1865. For the most part, these deposits produced only moderately good sapphires. The discovery of sapphires in Yogo Creek was different. In 1895, famed gemologist G.F. Kunz, working for Tiffany’s of New York, labeled them “the finest precious gemstones ever found in the United States”.

The Yogo stones are prized for their good clarity and wonderful natural color, often called “cornflower blue”.  Unlike the other Montana sapphires, the Yogo gems require no heat treatment whatsoever.

This fabricated pin features a carefully matched and graduated suite of gem quality Yogo sapphires estimated to weigh a total of ~ 3.5 cts. The style tells us made right around the turn of the century– to me, the delicacy of the design suggests the Edwardian style.

Yogo brooch back, w-pin
Yogo pin reverse shows removable pin and folding pendant loop

The pin was made specifically as a multi-purpose piece. The pin stem and catch both unscrew and the setting at the top of the circle has a fold up loop that can accommodate a fine chain. At one time, something dangled below the bow– you can see the little hook — but that is lost to the mists of time!

We’re members of the American Gem Society, antique jewelry buyers, restorers and appraisers, gemologists specializing in fine gemstones of all types and custom jewelry designers. Yes, we do it all, and we do it well. Stop by the shop and we’ll show you some of our unique jewelry. Open Tues. – Sat. 10 am to 5:30 pm.

Piece of Eight Silver Coin– Now That’s an Antique!

Atocha cross

We were thrilled to acquire this pendant featuring an authentic Piece of Eight silver coin from the most valuable sunken treasure ever found.

In 1985, after 16 years of searching, famed (and persistent) treasure hunter Mel Fisher discovered the mother lode of all treasures off the Florida Keys. Valued at over 500 million dollars, the Atocha treasure contained tons of silver coins and bars along with gold objects, jewelry and gems.

On September 5,1622, heavily laden and bound for Spain from Havana with 28 other ships, the galleon Nuestra Señora de Atocha was driven on to a reef in the Florida straits by a hurricane. The immense treasure, which took over two months to load and record, was supposed to pay the debts of King Philip IV. As a result of this loss, Spain gradually withdrew from the Caribbean, leaving it to French and British influence. In a sense, the American Revolution, the Louisiana Purchase, the Lewis and Clark Expedition, and countless historical events in the Americas were directly linked to the wreck of the Atocha.

The peso de ocho, also known as the Spanish dollar, enjoyed world wide acceptance from 1497 onward. In fact, it was the coin on which the original United States dollar was based and remained legal tender in the US until the coinage act of 1857. Talk about historical significance!

These coins owe their odd shape to the method of manufacture. The Spaniards enslaved the indigenous people of the Americas to mine and mint these coins. After refining, the silver was cast into crude bars. The individual coins were cut from these bars, then clipped by the assayer to the proper weight. Once they were clipped, each side was struck with hammer and crude hand held dies.

Our attractive coin is mounted in a 14K gold frame and is suspended on a 20″ Byzantine style chain. The coin is from the Potosi Mint in Peru, dated circa 1618 – 1621– note the P mint mark on the Shield side. It’s almost 400 years since it was struck! Now that’s an antique!


Atocha shield
Spanish Shield with P mint mark

We have the original documentation and grading from Mel Fisher. It’s an 8 reale coin, grade 3. Our Potosi coin has the Cross of Leon on one side, showing the Lion of Leon and the Castle of Castile, while the reverse has the Hapsburg shield, the denomination, the mint mark and the assayer’s mark.

You can still buy something very similar from Mel Fisher’s company for ~$2700. Ours, including the grand chain is $1250.

Our vintage and antique jewelry department is always brimming with surprises and delights. Stop by the shop Tuesday thru Saturday, 10 am to 5;30 pm to see this and other treasures.

Enameled Jewelry 101- A Historical Perspective


Chatelaine 1

We recently had the pleasure of examining this superb antique chatelaine. Centuries ago, the lady of the house wore the chatelaine, a strap or bag looped over a belt at the waist. Typically, the various tools necessary for her to deal with her daily tasks, items such as keys, scissors, watches, etc. were attached with chains. During the last half of the 18th century, the chatelaine became the in fashion among the aristocracy. This particular piece was obviously for the very wealthy– solid 18 karat gold beautifully decorated with rose cut diamonds, exquisite enameling and pearls. It was made circa 1780, just prior to the French Revolution by the watchmaker Robert Robin, a favorite of Marie Antoinette.

The chatelaine shows several enameling techniques. Enameling is an ancient decorative technique in which powdered glass is fused directly on to metal. We don’t know if Robin actually did the enameling on this piece– it’s likely that he had a specialist enamel his work.

The watch dial has an opaque white enamel base to which the delicate numbers, letters and decorations have been painted with an ultra fine powder of black enamel, then delicately fired.

Chatelaine Watch Front
Enameled watch dial with painted numerals

The back of the watch is a tour-de-force example of guilloche enamel, a variant of basse-taille enameling. Guilloche enameling is most famously seen on many of the magnificent Faberge eggs made for the Czar of Russia. The surface of the gold was engraved with a precise pattern by a special geometric lathe known as a rose engine. The pattern creates a truly dazzling effect beneath the vivid cobalt blue transparent enamel.

Chatelaine Watch back 1
Guilloche enameled back

The center is a dramatic whorl of rose cut diamonds set in silver– the jewelers of the time didn’t yet work with platinum or white gold. The diamond setting was attached via rivets thru special openings in the enamel. The pearls surrounding the enamel were natural Oriental pearls, most likely from the Persian Gulf or the Indian Ocean, set into the gold after the last firing and finishing of the enamel.

Around the edge, we see exquisite bright golden leaves within the enamel. The enamelist made these from hi karat gold foils. As seen by the uniformity of the decorations, he probably used a tiny die and hub like a cookie-cutter to cut the delicate foil. The foils were carefully applied to the enamel surface with special adhesive that would dissipate during the firing process, then covered with subsequent layers of enamel. The enamel was applied in many thin layers, firing the gold disc almost to melting over and over again. A piece like this could easily have a dozen firings.

Foil detail
Gold foil decoration

The chains of the chatelaine feature several different enameled components. This painted enamel panel shows a classic scene. The enamelist used ultra fine opaque enamel powders, ground almost to dust and carefully sieved, then applied like paints. The fineness of the enamel means the firing process is extra critical.

Chatelaine panel
Painted enamel, guilloche and foil
Chatelaine Detail 3
Reverse with guilloche, foil, and painted leaves
Chatelaine Detail 4
Painted enamel with gold deco


Jewelry enameling is not a lost art. Today’s artisans have the know-how but don’t often have the patronage to invest the hours required to make pieces like this. In subsequent posts, we’ll discuss the basics of enameling in more detail, show other techniques, and show more examples of period and modern enamels. Stop by Mardon to see enameled jewelry par excellence!


Antique Jewelry Shows Fine Craftsmanship

Edwardian Necklace

I-23222 Antique Platinum Necklace

This exquisite necklace from the Edwardian period, circa 1900-1915, exhibits the fine craftsmanship we associate with antique jewelry. The piece was made by fabricating and forming raw metals into the parts of the jewel. The main body and dangles began as thin sheets of platinum. The chain and bezels were made from hand-drawn wires and tubing. Many steps and hours of effort were required to bring forth this dazzling work. This magnificent example of antique jewelry really deserves a close look!

Jewelers of the period were fine artists capable of precise life size drawings. This beautiful design has elements of the Art Nouveau style with flowing whiplash lines and floral elements, yet the effect is more formal and refined than Nouveau. An actual size drawing was done on paper, then transferred to the platinum sheet.

Using a classic technique known as piercing, the jeweler drilled small holes at the openings in the design, then carefully removed excess metal with a fine jeweler’s saw. Even the delicate crescent shapes flowing from the flowers were pierced– a less exacting method used in this period was to make the crescents from fine wires which were then soldered into the openings.

He constructed the three drop shapes from sheet and the round bezels from platinum tubes formed through a draw plate. The chain was assembled from tiny rings, soldered together one at a time. The five small bezels around the largest diamond were soldered into place.

Next, the jeweler shaped the piece using the chasing and repousse method. The work was placed on a surface of pitch that is firm but slightly yielding then worked with steel tools and a chasing hammer to push and “chase” the metal into the desired shape. The purpose was to add slight doming and subtle dimensions so the piece would be more dynamic.

After piercing and shaping, the diamonds were set into the main portion of the work with the bead and bright cut method. A hole smaller than the diameter of the diamond was drilled through the platinum and a seat was cut to fit the bottom of each diamond. The actual setting is accomplished by small curls carved directly from the platinum which shaped into beads on the edges of the diamonds with a beading tool. Excess metal is carved away from the stones to create a reflective “picture frame” effect and to leave free standing beads

Before the actual setting, excess metal was also trimmed under each seat by a technique known as azuring. The purpose of azuring is twofold– it allows the backs of the diamond to be cleaned easily and makes the piece lighter in weight. Azuring requires great skill and is time consuming, so it’s only seen on the finest pieces. The rest of the diamonds were set into the bezels and drops.

IMG_4318

After setting, the jeweler applied a decoration called milgraining along the edges and around the settings. Tiny beads are created by rolling a special knurled wheel along the edges of the design. During setting and milgraining, the work was supported on a shellac stick or on the same pitch used for the repousse.

IMG_4319

The sawn surfaces of the openings in the design were painstakingly finished with a technique known as trumming.  Strings or strips of cloth coated with polishing compounds were threaded into each opening and the piece would be moved back and forth along the taut strings until the surface was smooth and polished. Trumming a piece like this takes hours.

A rim of platinum known as the underbezel was fitted and soldered around the outer edge of the piece.The drops, bezels and chain were completed and attached. After the final polish and inspection, voila– a complete work of art!

You can see how much time, patience and skill went into creating this piece. Even the smallest detail was important. As a jeweler, I was surprised and delighted by the elegance and simplicity of the safety clasp at the back of the chain– just three rings of platinum and a strip assembled into an effective fail-safe clasp.

Safety clasp

These jewelry making techniques and methods have been developed over centuries and are timeless, passed on from jeweler to jeweler. This exuberant brooch from the 50’s was made in much the same way, fabricated from sheet and wire, diamonds bead set and azured. Notice how the backs of both pieces are as beautifully finished as the front.

50's Brooch details
I-23052  50’s brooch in 18K white gold

Stop by the shop to see these antique and vintage jewels– we’ll be happy to discuss the methods used and explain the technology of the time. And remember, we’re always interested in buying antique and vintage pieces– we’ ll soon find a new home where they’ll be loved and cherished.